 Save
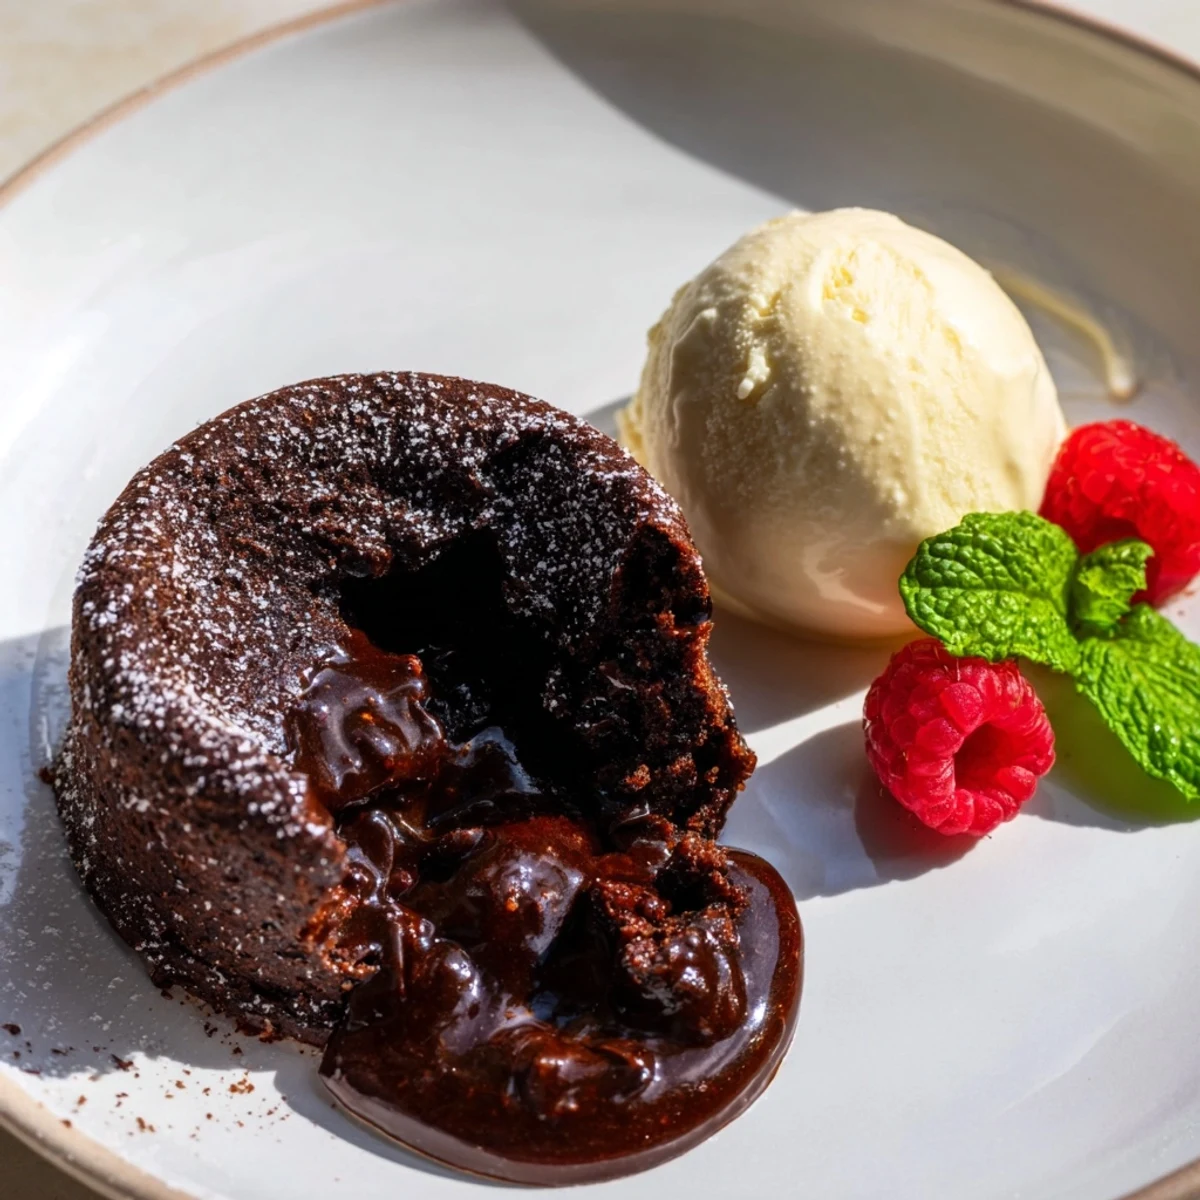
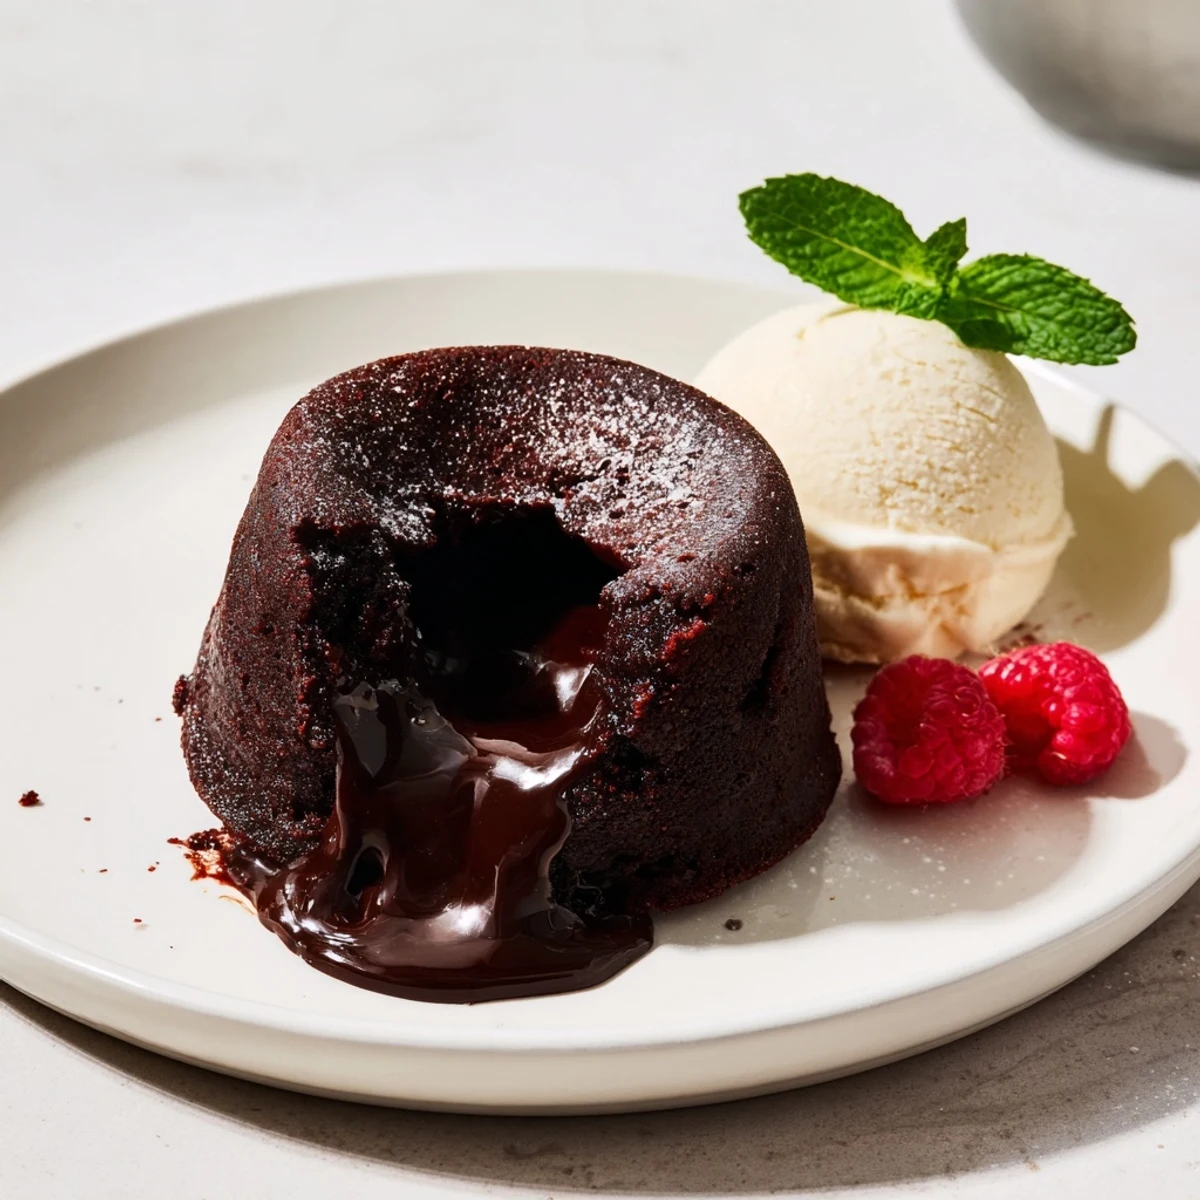
Save Indulge in these luscious chocolate lava cakes featuring a rich, molten center. Prepared by melting dark chocolate and butter, then gently folded with eggs, sugar, and a hint of flour and salt, the batter is baked briefly to maintain a soft center. Served warm with creamy vanilla ice cream and optional garnishes like fresh berries or mint, these mini cakes deliver a perfect balance of richness and freshness. Simple to prepare yet impressive, they take about 27 minutes total, making them ideal for a quick but elegant dessert.
My oven timer had just buzzed when I heard my neighbor's laugh through the kitchen window. She was watching me hover over four tiny ramekins like they held something precious. They did. Inside each one, dark chocolate batter waited to transform into something molten and magic. I'd been chasing that perfect lava cake for months, and this time, the centers were finally going to cooperate.
I made these for my sister's birthday once, and she didn't say a word for the first three bites. She just sat there with her eyes closed, fork in hand, and when she finally looked up, she asked if I could make them every year. I've kept that promise. Every January, four ramekins go into the oven, and every year, she gets that same quiet, happy look on her face.
Ingredients
- Dark chocolate (70% cocoa): This is the soul of the cake, so use good quality chocolate that you'd actually enjoy eating on its own.
- Unsalted butter: It melts into the chocolate and gives the batter that silky, rich texture that makes the center flow.
- Eggs and egg yolks: The extra yolks add richness and help create that custardy molten center.
- Granulated sugar: Just enough to sweeten without overpowering the deep chocolate flavor.
- All-purpose flour: A small amount gives structure to the edges while leaving the center soft.
- Fine sea salt: It sharpens the chocolate and brings all the flavors into focus.
- Vanilla ice cream: Cold, creamy, and the perfect partner to warm chocolate.
- Cocoa powder or powdered sugar: A light dusting makes them look bakery-worthy.
- Fresh berries or mint: Optional, but a pop of color and brightness never hurts.
Instructions
- Prep the ramekins:
- Butter the insides generously, then dust with flour and tap out the excess. This step is your insurance policy against cakes that stick and break your heart.
- Melt the chocolate and butter:
- Stir them together over simmering water or in the microwave until smooth and glossy. Let it cool for a minute so it doesn't scramble the eggs later.
- Whisk the eggs and sugar:
- Beat them together until they're pale and a little fluffy, about two minutes. This adds air and lightness to the batter.
- Combine chocolate and eggs:
- Fold the cooled chocolate into the egg mixture gently, like you're tucking in a blanket. You want it smooth but not deflated.
- Add flour and salt:
- Sift them in and fold just until you don't see any streaks. Overmixing will make the cakes dense instead of tender.
- Fill the ramekins:
- Divide the batter evenly among the four ramekins. They should be about three-quarters full.
- Bake:
- Set them on a baking tray and slide into a hot oven for 10 to 12 minutes. The edges should look set, but the centers should still jiggle slightly when you nudge the tray.
- Invert and serve:
- Let them rest for one minute, then run a knife around the edges and flip each cake onto a plate. Dust with cocoa or powdered sugar, add a scoop of ice cream, and serve immediately.
 Save
Save There was a night when the power flickered halfway through baking, and I thought I'd lost the whole batch. But the oven held its heat just long enough, and when I inverted those cakes, the centers poured out like they were supposed to. My husband looked at me like I'd pulled off a miracle. I didn't tell him it was mostly luck.
How to Know When They're Done
The edges should look firm and slightly pulled away from the sides of the ramekin, but the center should still wobble when you gently shake the tray. It feels risky to pull them out when they look underdone, but that's exactly when they're perfect. If you wait until they look fully set, you've waited too long.
Make-Ahead Tips
You can mix the batter, pour it into the ramekins, cover them with plastic wrap, and refrigerate for up to 24 hours. When you're ready to bake, let them sit on the counter for 20 minutes to take the chill off, then bake as directed. It's a lifesaver when you're hosting and don't want to be whisking eggs while your guests are waiting for dessert.
Serving Suggestions
These cakes are rich, so a little goes a long way. The vanilla ice cream is essential because the cold cuts through the warmth and sweetness. Fresh raspberries or a few mint leaves add a bright note that balances the chocolate.
- Try a drizzle of salted caramel sauce over the top for extra indulgence.
- A shot of espresso on the side turns this into a grown-up coffee and dessert moment.
- If you have leftover ganache, a spoonful on the plate before inverting the cake adds even more richness.
 Save
Save Every time I make these, I'm reminded that some recipes are worth the fuss. The look on someone's face when they break into that molten center is all the reward you need.
Recipe FAQs
- → How do I achieve a molten center in the cakes?
-
Bake the cakes just until the edges are set but the center remains soft and slightly jiggly, typically 10–12 minutes at 220°C (425°F).
- → Can I prepare the batter ahead of time?
-
Yes, you can refrigerate the batter and bring it to room temperature before baking for the best results.
- → What variations can enhance the flavor?
-
Adding a splash of espresso or a pinch of cayenne pepper to the batter adds depth and a subtle kick.
- → What tools are essential for making these cakes?
-
Use ramekins for baking, a heatproof bowl or microwave-safe bowl for melting chocolate, a whisk, and baking tray.
- → How should I serve these cakes for best presentation?
-
Invert the cakes onto plates, dust with cocoa powder or powdered sugar, and add a scoop of vanilla ice cream plus fresh berries or mint for garnish.
- → Are there any allergen considerations?
-
These include eggs, dairy, and gluten; check chocolate labels for soy content if sensitive.
