 Save
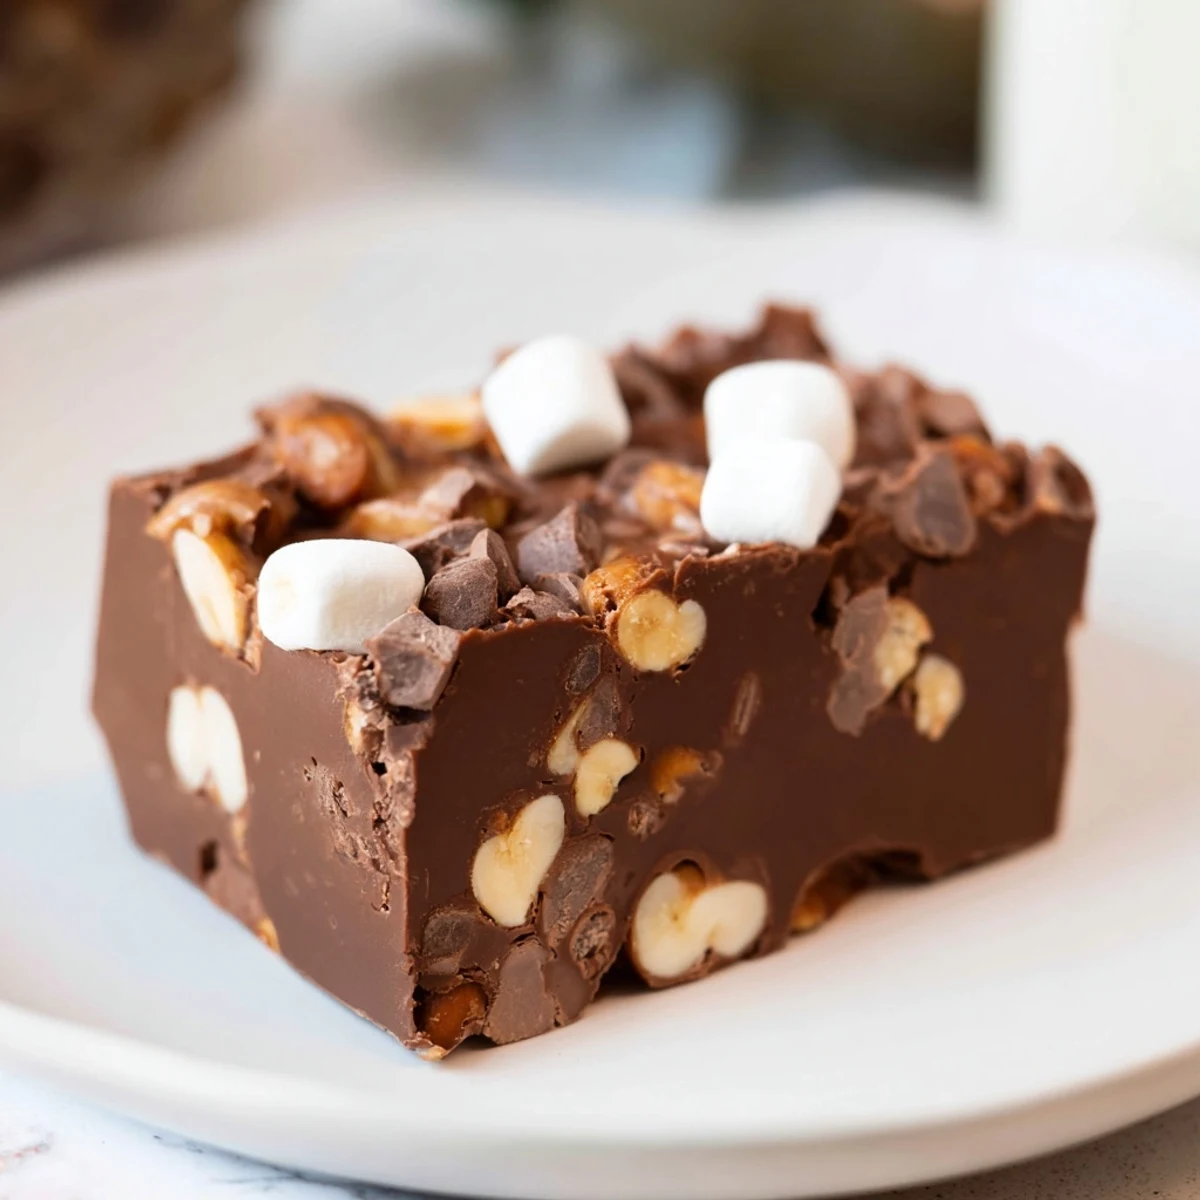
Save This indulgent rocky road fudge combines melted semi-sweet chocolate with sweetened condensed milk and butter for an incredibly smooth, creamy base. The mixture gets studded with pillowy mini marshmallows, roasted peanuts or walnuts, and optional milk chocolate chips for extra texture and crunch. After just 15 minutes of active preparation, simply chill for two hours until perfectly set. The result is a rich, decadent confection with the classic rocky road combination of smooth chocolate, gooey marshmallows, and satisfying nutty crunch in every bite.
The first time I made rocky road fudge was during a snow day when my kids were bouncing off the walls and I needed something to occupy them fast. We ended up with chocolate smeared on countertops and marshmallows mysteriously disappearing, but the fudge that emerged became an instant family legend. Now whenever the weather turns dreary or someone needs a pick-me-up, this recipe comes out.
Last Christmas, I made six batches of this fudge for different neighbors and teachers packages. One neighbor told me she hid it from her family so she could have it all to herself, which honestly I understand completely. Theres something about the sweet and salty combo that makes people lose all self-control.
Ingredients
- Semi-sweet chocolate chips: I find this amount gives the perfect sweetness level without being overwhelming, and good quality chips really do make a difference in the final texture
- Sweetened condensed milk: This is what creates that impossibly smooth fudge consistency—do not substitute with evaporated milk or regular milk
- Unsalted butter: Just enough to add richness and help the chocolate melt beautifully without interfering with the setting process
- Mini marshmallows: The mini ones distribute more evenly throughout the fudge than regular-sized ones
- Roasted unsalted peanuts: I prefer peanuts for that classic rocky road taste, but walnuts work beautifully too if you want something milder
- Milk chocolate chips: These add little pockets of extra sweetness and texture, though they are optional
Instructions
- Prepare your pan:
- Lining your pan with parchment paper is non-negotiable here—the overhang becomes your handles when you need to lift the whole fudge block out later
- Melt the base:
- Keep the heat low and stir constantly, because chocolate and condensed milk can scorch easily and once they burn, there is no saving the batch
- Cool slightly:
- This brief resting period prevents the marshmallows from melting into nothingness when you fold them in
- Gentle folding:
- Mix just until combined—overworking it will deflate those fluffy marshmallows and you want them to stay pillowy
- Set and chill:
- The two-hour wait feels endless, but rushing it means you will end up with soft fudge instead of clean squares
- Cutting time:
- Use a sharp knife and run it under hot water between cuts for the cleanest slices
 Save
Save My grandmother would keep a batch of fudge in her freezer and pull it out whenever we visited, insisting that the slight chill made it even better. I now do the same thing, and honestly she was right about almost everything.
Getting the Perfect Texture
The difference between grainy fudge and silky smooth fudge comes down to patience and temperature control. I have learned that rushing the melting process or cranking up the heat to speed things along always backfires. Low and slow gives you that professional chocolate shop texture that makes people ask where you bought it.
Mix-In Magic
One year I got experimental and added pretzels instead of nuts, creating this sweet and salty situation that was unexpectedly amazing. The key is keeping your mix-ins roughly the same size so each bite has the same ratio of chocolate to add-ins.
Storage Secrets
Fudge keeps surprisingly well in the freezer for up to three months if you wrap it tightly. I layer pieces between wax paper in a freezer container and can pull out just what I need for sudden cravings or unexpected guests.
- Separate layers with wax paper so the pieces do not stick together
- Thaw frozen fudge in the refrigerator to prevent condensation from forming on the surface
- Room temperature fudge has the best texture, so let chilled pieces sit out for 15 minutes before serving
 Save
Save This recipe has saved me more times than I can count when I need a last-minute treat or a homemade gift that looks impressive. The fact that it takes about 15 minutes of actual work is our little secret.
Recipe FAQs
- → How long does rocky road fudge need to chill?
-
Refrigerate the fudge for at least 2 hours until completely firm and set. For best results, let it chill overnight before cutting.
- → Can I use different nuts in rocky road fudge?
-
Absolutely. Roasted peanuts, walnuts, pecans, or almonds all work beautifully. Choose your favorite or whatever you have on hand.
- → How should I store rocky road fudge?
-
Keep in an airtight container in the refrigerator for up to 1 week. The cool temperature helps maintain the perfect texture and prevents melting.
- → Can I make rocky road fudge nut-free?
-
Yes. Simply omit the nuts and add extra marshmallows or dried fruit like cranberries and cherries for added texture and sweetness.
- → What type of chocolate works best for fudge?
-
Semi-sweet chocolate chips create the classic fudge flavor, but you can substitute dark chocolate for a richer taste or milk chocolate for sweeter results.
- → Why do I need to let the chocolate mixture cool before adding mix-ins?
-
Cooling for 2-3 minutes prevents the marshmallows from melting completely, ensuring they stay fluffy and create those signature pockets throughout the fudge.
