 Save
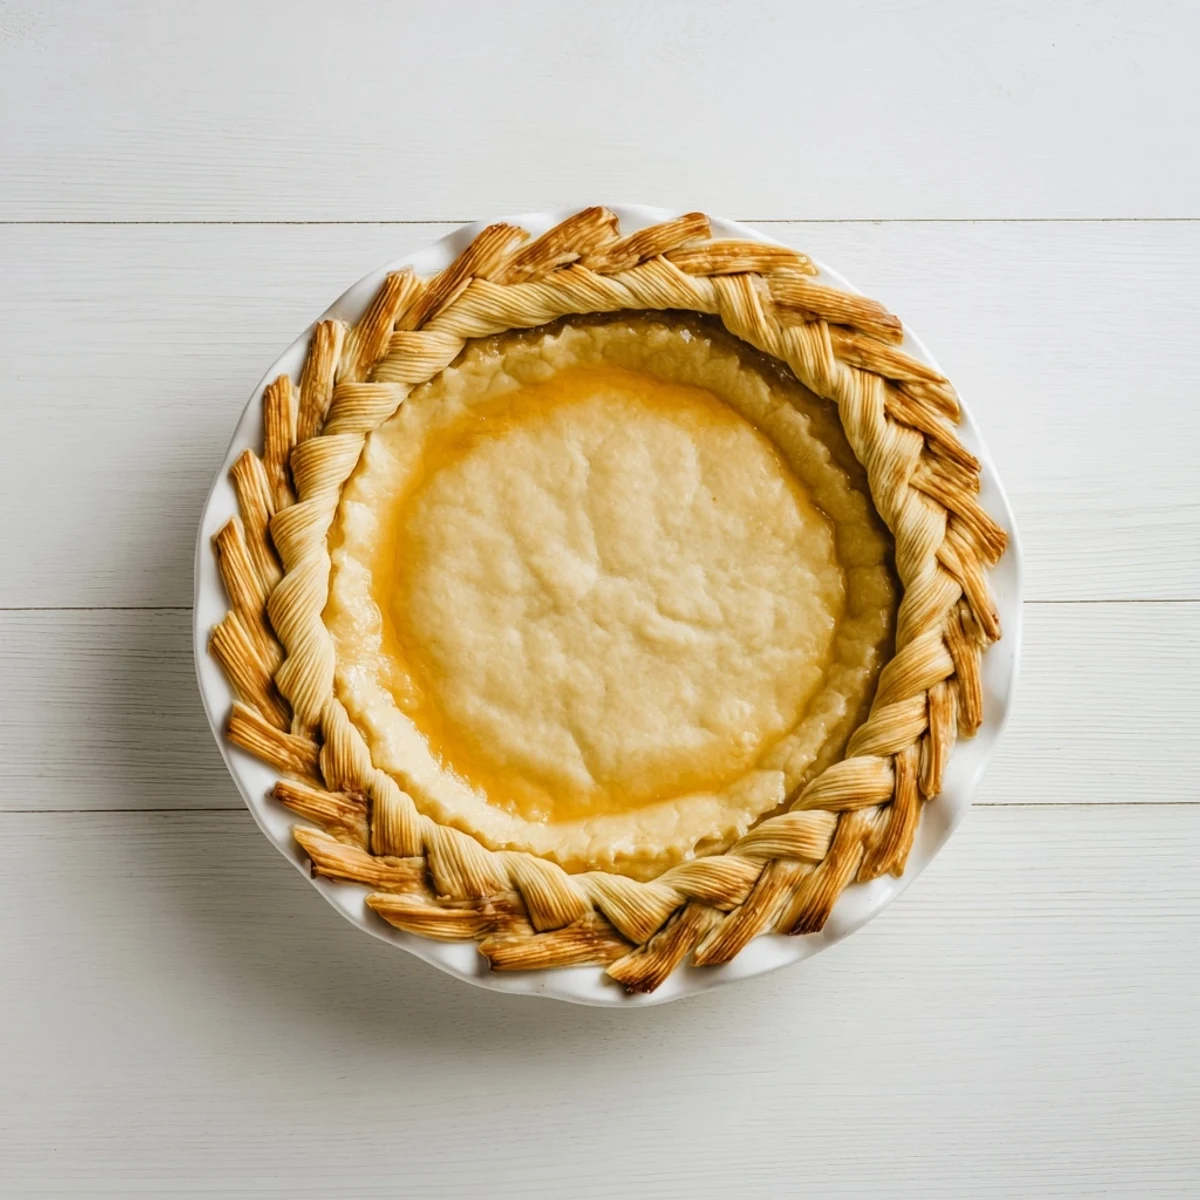
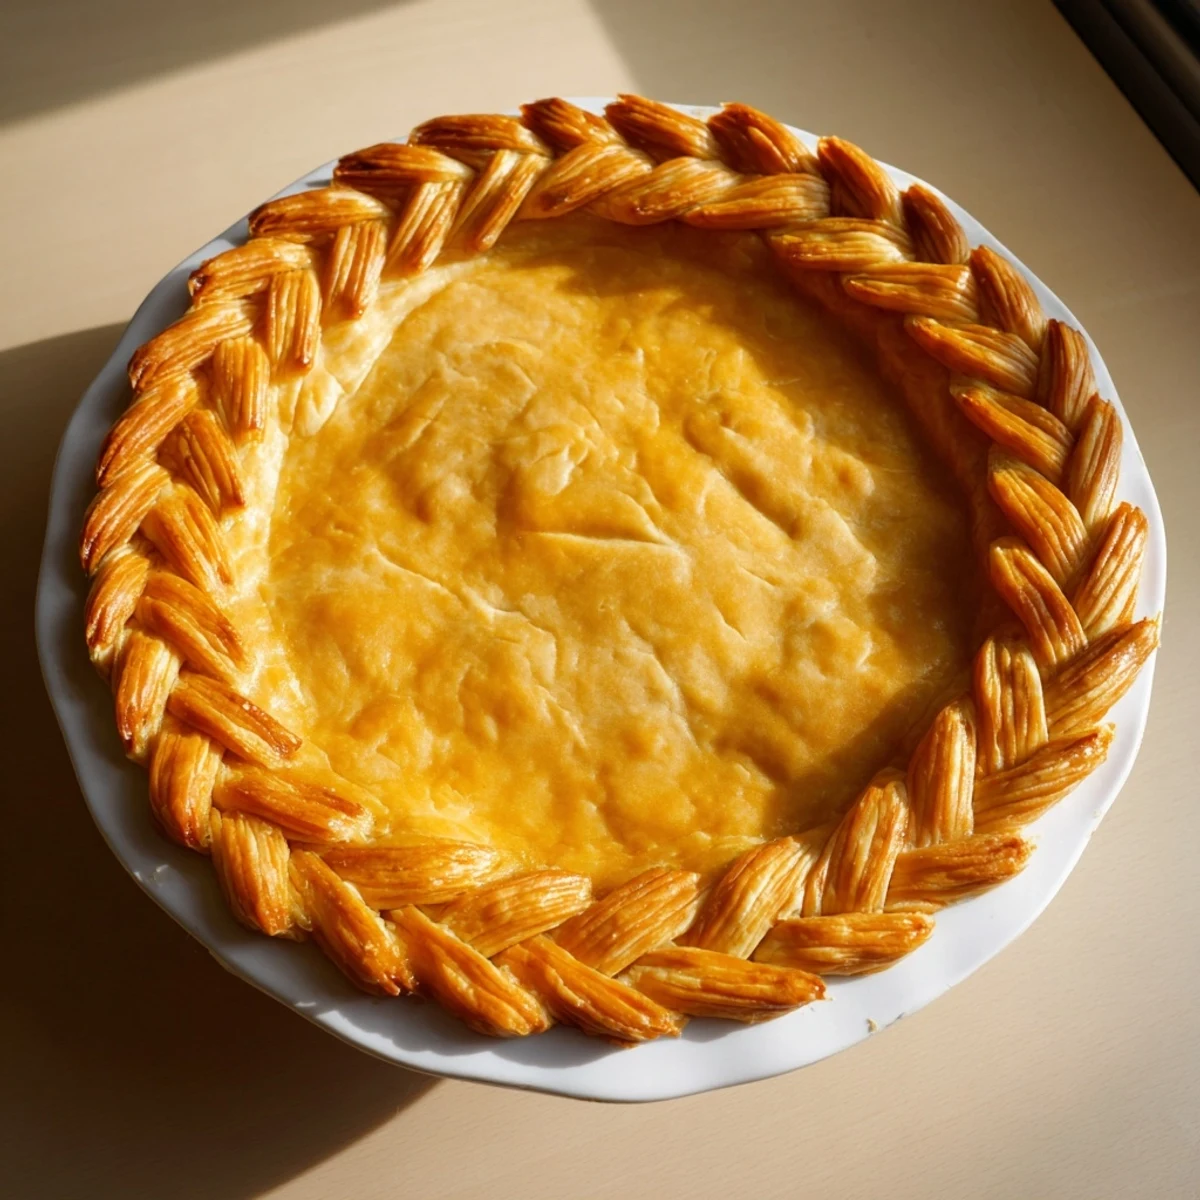
Save Elevate your homemade pies with a stunning fishtail braid crust that rivals bakery quality. This technique involves weaving four strips of pastry dough in an intricate over-under pattern, creating a decorative edge that's as beautiful as it is delicious. Perfect for special occasions or when you want to impress guests, this braided crust works equally well with fruit pies, custard fillings, or savory quiches. The process requires basic pastry skills and about 45 minutes from start to finish, resulting in a golden, flaky crust that looks professionally decorated.
My sister called me at 11 PM the night before Thanksgiving, panicked because she'd promised to bring the most impressive dessert to our family gathering. That's when I suggested the fishtail braid crust I'd been experimenting with, something that looks like it came from a fancy bakery but actually just takes patience and a steady hand. She showed up the next day beaming, and even our pie-snob aunt had to take photos before digging in. Now it's become our signature trick for holidays when we want to make people gasp before they even taste what's inside.
I first attempted this crust during a rainy Sunday when I was supposed to be studying for finals but found myself procrastinating in the kitchen instead. My roommates gathered around watching me braid, making coffee and offering completely unhelpful suggestions about which strip went where. We ended up burning the first batch because we got distracted arguing about the pattern, but the second one came out golden and we ate it standing up, breaking off pieces of crust straight from the pie plate.
Ingredients
- 2 1/2 cups all-purpose flour: The foundation of everything good in pastry life, and keeping some extra nearby for dusting your work surface will save you from sticky situations
- 1 cup cold unsalted butter: Cold butter creates those magical flaky layers we all chase after, so don't let it sit out or you'll lose the texture that makes people close their eyes when they bite down
- 1 tsp salt: Even sweet pies need a little salt to pop the flavors, and trust me, cutting it out will leave your crust tasting flat and sad
- 1 tbsp sugar: Just enough to help the crust brown beautifully and give a subtle sweetness that plays nice with any filling you choose
- 6 to 8 tbsp ice water: Start with less and add only what you need because too much water makes for tough dough, and nobody wants to chew through disappointment
- 1 egg beaten: This is your golden ticket to that gorgeous professional-looking finish that makes people think you secretly went to culinary school
- 1 tbsp milk: Mixing this into your egg wash makes it brush on smoothly and gives the crust that perfect deep golden color we're all after
Instructions
- Mix your dry ingredients like you mean it:
- Whisk together flour, salt, and sugar in a large bowl until they're completely combined, because pockets of salt in your pie crust will ruin someone's day unexpectedly
- Cut in that cold butter:
- Work those butter cubes into the flour with a pastry cutter or your fingertips until everything looks like coarse crumbs, but stop before the butter starts melting or you'll lose all those gorgeous flaky layers
- Bring it together with ice water:
- Drizzle in ice water gradually, mixing gently until the dough just comes together, then divide it into two discs, wrap them up, and let them chill in the fridge for at least an hour because patience is what separates good crust from great crust
- Roll out your base:
- Roll one disc on a lightly floured surface until it fits your 9-inch pie plate, gently press it in, trim the edges, and pop it back in the fridge while you work on the braids because cold dough is your best friend
- Prepare your braid strips:
- Roll the second disc to about 1/4 inch thick and cut twelve long even strips, grouping them into sets of four and pinching the tops together so you're ready to start the magic
- Create the fishtail braid:
- Label your four strips from left to right as 1, 2, 3, and 4, then cross strip 1 over 2, under 3, and over 4 before repeating with the new left-most strip until you reach the end
- Attach your beautiful braids:
- Carefully transfer each braid to the edge of your chilled pie crust, pressing gently to help it stick and using a tiny bit of water as glue if needed
- Chill and preheat:
- Give your assembled pie 15 minutes in the fridge to firm everything up while you preheat your oven to 400°F because working with cold dough prevents shrinking and sad sagging crusts
- Give it that golden glow:
- Brush your braids with the egg wash mixture, and if you're blind baking, line the crust with parchment and fill with weights so it keeps its shape
- Bake until gorgeous:
- Bake for 12 to 15 minutes until everything is golden and beautiful, then remove the weights and finish according to your chosen pie recipe
 Save
Save This crust became my go-to for bringing to dinner parties after I showed up with a braided peach pie and watched the host's eyes widen like I'd brought something from a bakery. Everyone assumed it took hours of practice, but really it was just me working slowly with cold dough and following the pattern one strip at a time while drinking tea and listening to podcasts.
Making This Technique Your Own
I've learned that swapping in some whole wheat flour gives the crust a lovely nutty flavor that pairs beautifully with fruit fillings, especially apple and pear combinations. Sometimes I'll add a pinch of cinnamon directly to the dough when I'm making dessert pies, because that subtle spice running through the braids makes every bite feel like autumn arrived early.
Working With The Braid Pattern
The fishtail braid can seem intimidating at first, but I've found that cutting all my strips first and arranging them in order helps my brain settle into the rhythm without getting confused. You can make shorter braids and join them along the crust edge, or if you're feeling ambitious and your strips are long enough, you can attempt one continuous braid that wraps all the way around the pie like an edible crown.
Serving And Storage Secrets
This versatile crust works with everything from fresh berry fillings to savory chicken pot pies, and I've even used the braiding technique on savory galettes that disappeared faster than I expected at brunch. The braids freeze beautifully unbaked, so sometimes I'll make a double batch and keep one in the freezer for those nights when I want to look fancy with zero effort.
- Leftover pie keeps well at room temperature for about two days, though in my house it rarely lasts that long
- Freeze unbaked braided crusts wrapped tightly in plastic for up to three months
- Reheat leftover slices in a 350°F oven for 10 minutes to bring back that fresh-baked crispiness
 Save
Save There's something deeply satisfying about serving a pie that makes people pause and appreciate the craft, even if they don't know how simple the technique really is. Happy braiding, and may your crusts always be golden and your kitchen always smell like butter and possibilities.
Recipe FAQs
- → How do I prevent the braids from unraveling during baking?
-
Chill the assembled pie for at least 15 minutes before baking to firm the dough. Press the braided strips firmly onto the crust edge and use a dab of water as glue if needed. Proper chilling helps the butter solidify, ensuring the woven pattern holds its shape in the oven.
- → Can I make this crust ahead of time?
-
Absolutely. Prepare the dough discs and refrigerate up to 2 days or freeze for up to 3 months. Thaw frozen dough overnight in the refrigerator. You can also assemble the complete braided crust, wrap well, and freeze unbaked—just add a few extra minutes to the baking time.
- → What's the difference between a fishtail and regular braid?
-
A fishtail braid uses four strands instead of three, creating a wider, flatter weave that sits beautifully against a pie edge. The pattern crosses the outermost strip over, then under, producing an intricate herringbone-like appearance that's more decorative than traditional three-strand braiding.
- → Why did my braids turn dark brown before the crust was done?
-
The thinner braided strips cook faster than the main crust. Cover the braid edge loosely with foil after 10 minutes of baking, or use a pie shield. This protects the delicate decoration while allowing the bottom crust to fully bake through.
- → Can I use store-bought pie dough?
-
Yes, refrigerated pie dough works perfectly for this technique. Let it thaw according to package directions, then roll and cut into strips as directed. The results may be slightly less tender than homemade, but the braided effect will still be impressive.
- → What fillings pair best with this decorative crust?
-
The neutral buttery flavor complements everything from apple and cherry pies to pumpkin and pecan. For savory options, try it with spinach quiche, chicken pot pie, or tomato tart. The intricate weave makes simple fillings feel elegant and special-occasion worthy.
