 Save
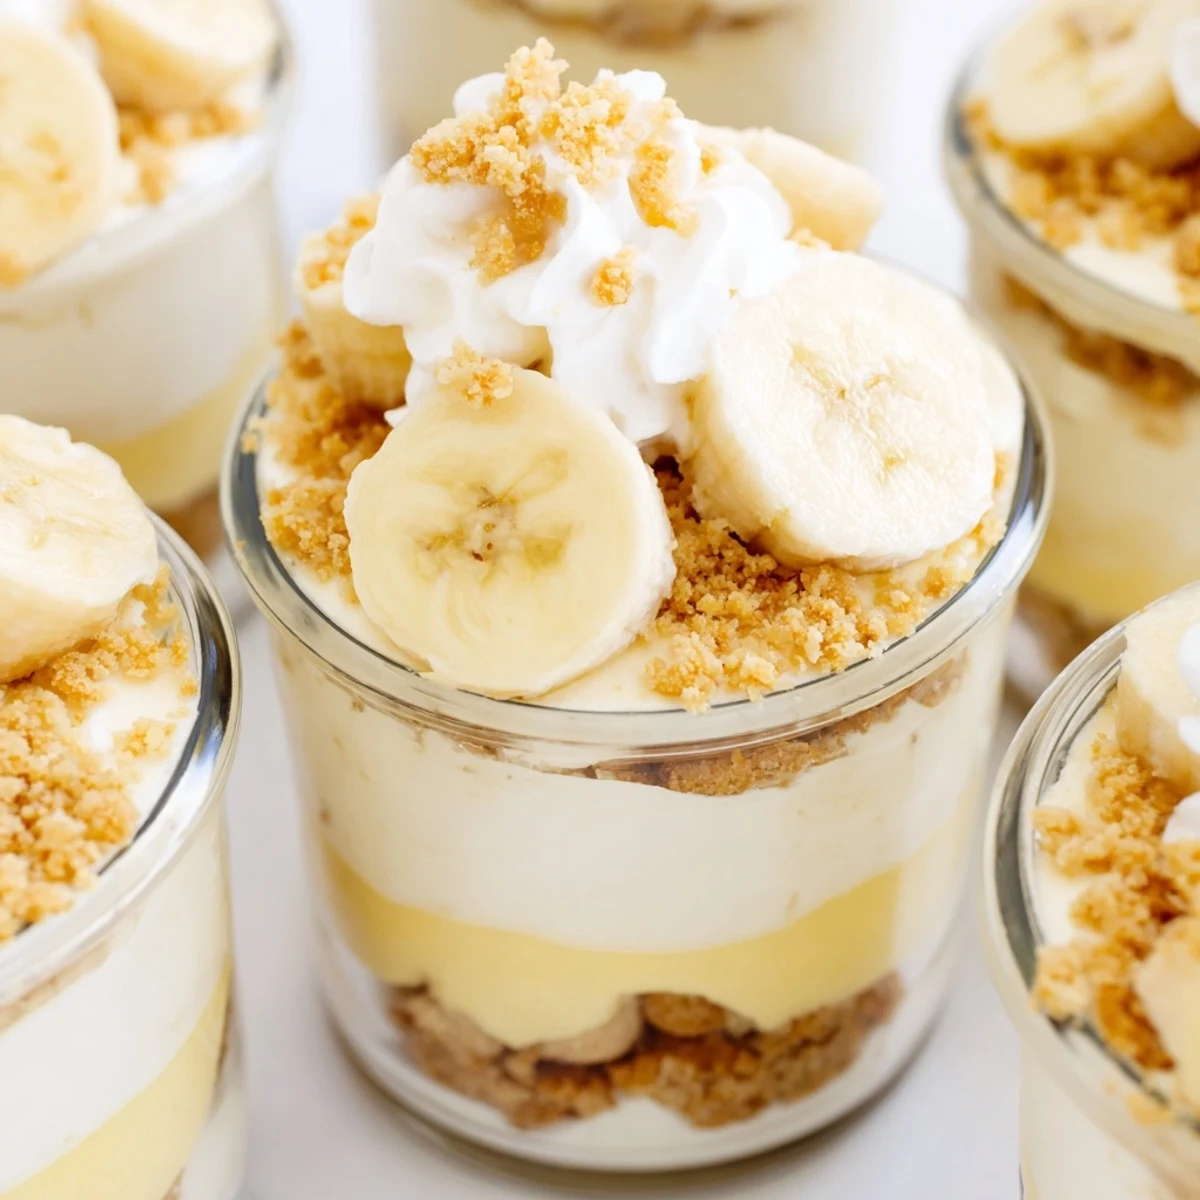
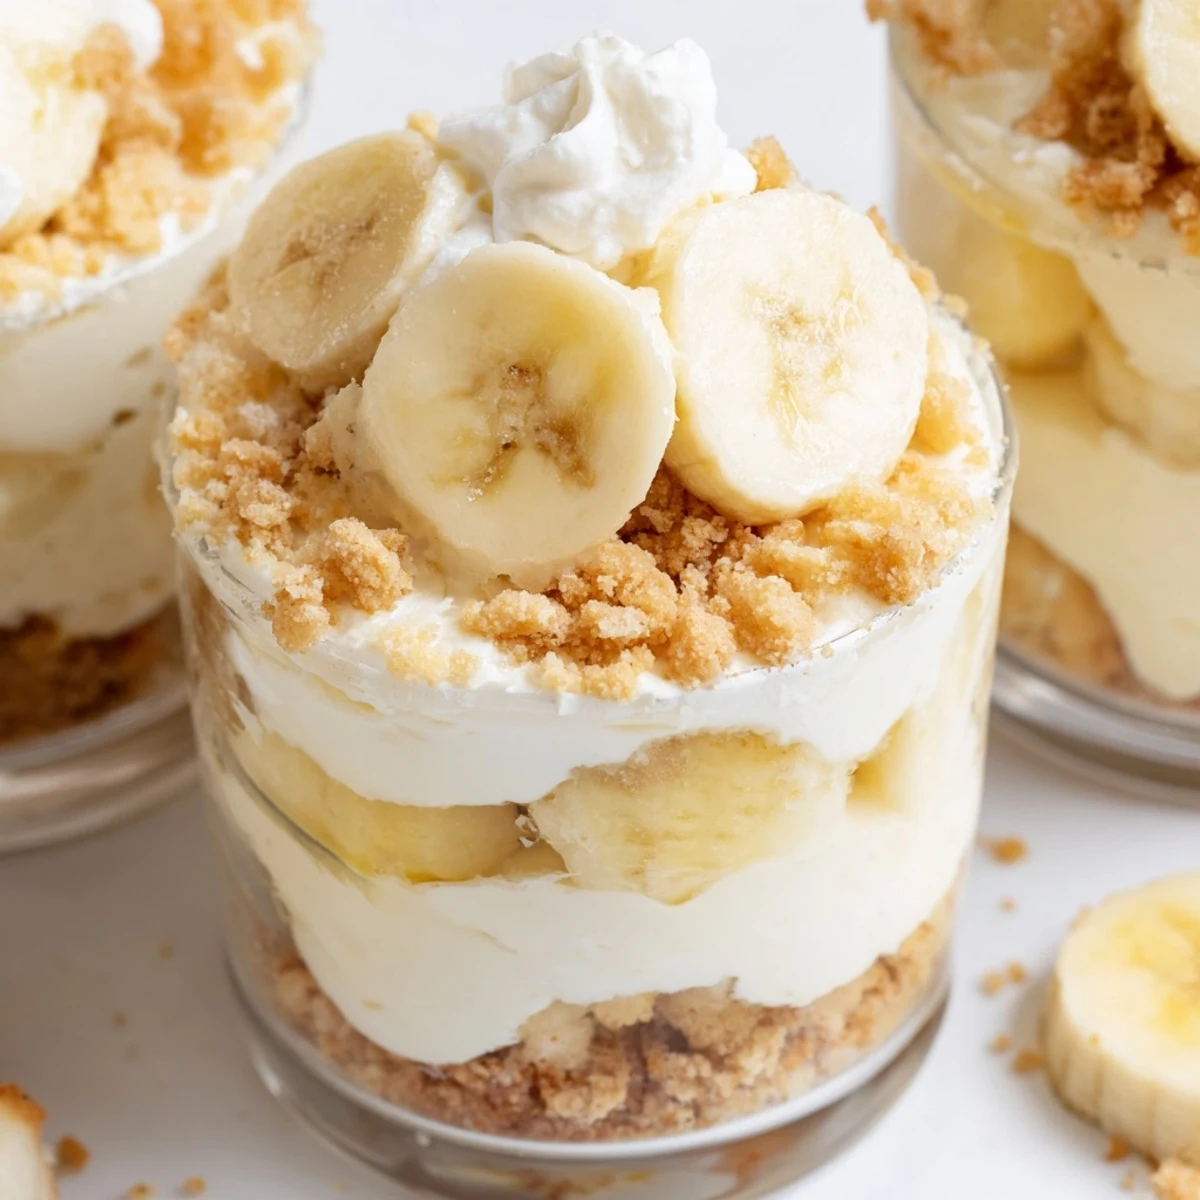
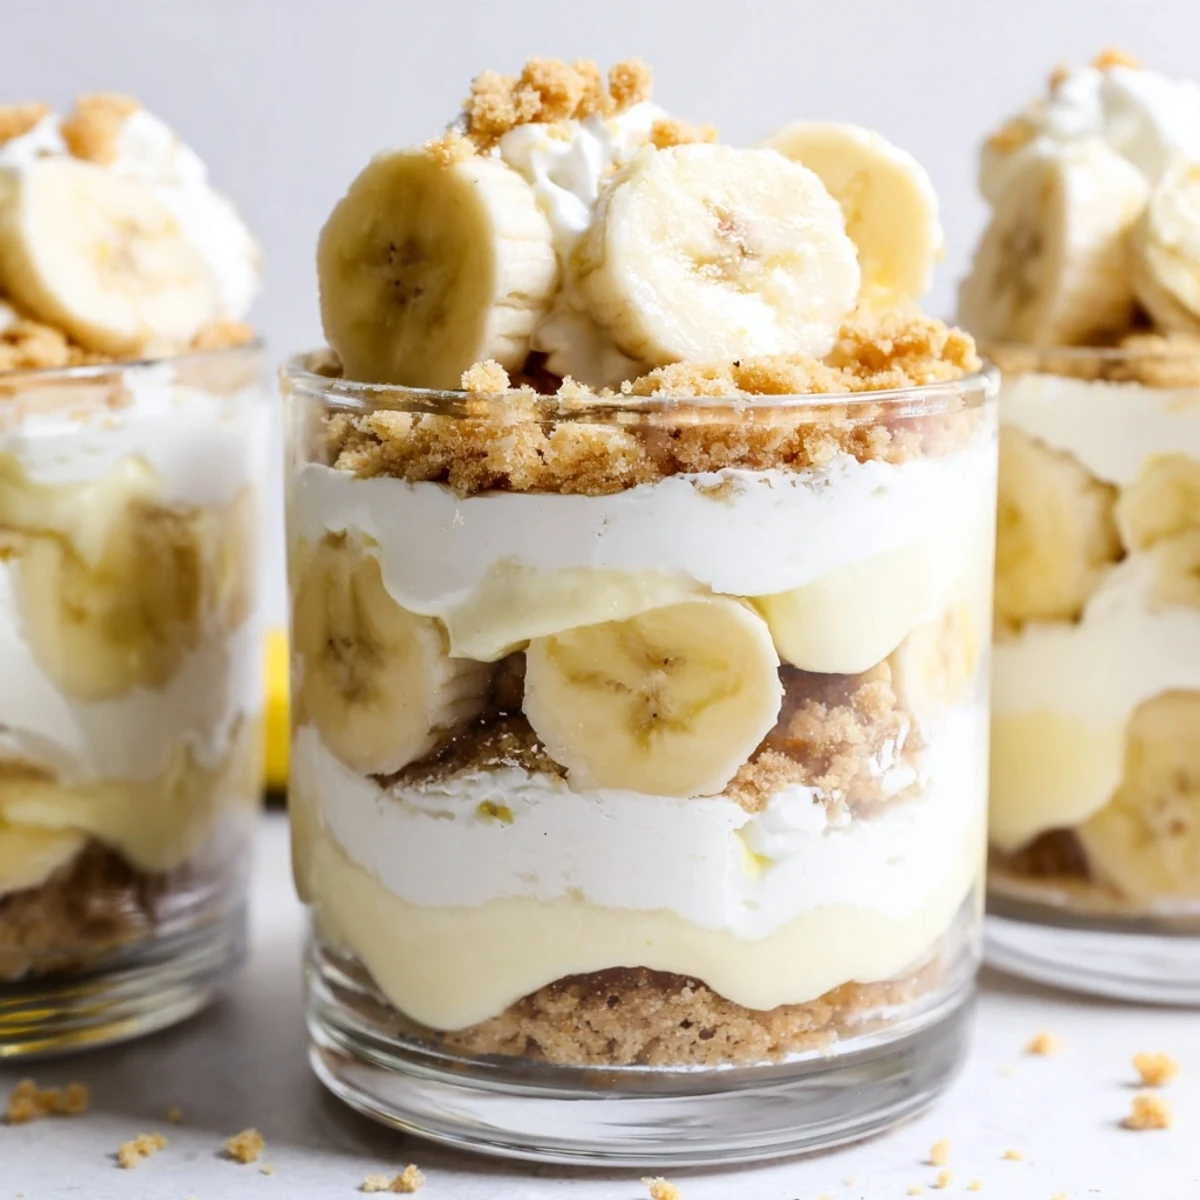
Save These individual cups combine the rich creaminess of cheesecake with classic banana pudding flavors. The no-bake preparation makes them perfect for warm weather or when you need an impressive dessert without turning on the oven. Each cup features a buttery vanilla wafer crust, velvety cheesecake filling, smooth banana pudding layer, and generous toppings of fresh bananas and crispy crumbs.
The assembly process is straightforward but creates stunning layered presentation. The texture contrast between creamy fillings, fresh banana slices, and crunchy wafer crumbs makes every bite interesting. Best prepared ahead and chilled for at least two hours to allow flavors to meld and layers to set properly.
The last-minute invitation to my sister's potluck had me scrambling through the pantry at 7 PM. These little cups saved the day entirely—no oven required, just creamy layers and that nostalgic banana flavor everyone loves but dressed up enough to feel special.
I made these for a summer birthday dinner once and watched my usually-dessert-averse father go back for seconds. Something about the familiar vanilla wafer crunch with that luscious cheesecake filling feels like home but elevated.
Ingredients
- 1 cup vanilla wafer cookies, crushed: Nilla wafers are traditional here—they soften beautifully while maintaining that essential crunch
- 2 tbsp unsalted butter, melted: Salted works too but adjust slightly since the wafers already have sodium
- 8 oz (225 g) cream cheese, softened: Leave it out for at least an hour—cold cream cheese creates lumps that ruin the silky texture
- 1/3 cup granulated sugar: White sugar keeps the filling pristine looking though I have used maple syrup for a deeper flavor note
- 1 tsp pure vanilla extract: Not imitation—the real stuff makes all the difference in a recipe with so few ingredients
- 1 cup heavy whipping cream, cold: The colder the better for achieving those stiff peaks that give the filling its cloud-like texture
- 1 (3.4 oz/96 g) package instant banana pudding mix: Do not cook and serve—it sets too firmly and loses that soft pudding consistency
- 1 1/4 cups cold whole milk: Skim milk makes a noticeably thinner pudding that can affect layer stability
- 2 ripe bananas, sliced: Yellow with some brown spots yield the best flavor but not so soft they collapse completely
Instructions
- Build the crust foundation:
- Combine crushed vanilla wafers and melted butter in a small bowl, mixing until evenly moistened and pressing about 2 tablespoons into the bottom of each serving cup. Press down lightly with the back of a spoon to create an even layer that will hold everything together beautifully.
- Prepare the cheesecake base:
- Beat the softened cream cheese, sugar, and vanilla extract with a hand mixer until completely smooth—this usually takes about 2 minutes of serious mixing to eliminate any cream cheese lumps.
- Whip the cream:
- In a separate bowl (crucial, or the cream won't whip properly), whip the cold heavy cream until stiff peaks form when you lift the beaters. The mixture should hold its shape without collapsing at all.
- Combine for silkiness:
- Gently fold the whipped cream into the cream cheese mixture using a rubber spatula, incorporating in three additions to keep as much air as possible. The final mixture should be light, fluffy, and smooth enough to scoop effortlessly.
- Make the pudding layer:
- Whisk together the instant banana pudding mix and cold milk in another bowl for exactly 2 minutes. The mixture will thicken considerably and should coat the back of a spoon heavily.
- Assemble the first layers:
- Layer about half the cheesecake filling over the crust in each cup, followed by a single layer of fresh banana slices. Try to place bananas in a single layer so each spoonful gets that fresh fruit burst.
- Add the pudding layer:
- Spoon the banana pudding over the bananas in each cup, dividing evenly so everyone gets roughly the same amount. The pudding should cover the bananas completely to prevent them from browning too quickly.
- Finish with remaining cheesecake:
- Top with the remaining cheesecake mixture, smoothing the tops with a small spoon or offset spatula for that polished, professional look.
- Add the finishing touches:
- Sprinkle each cup with additional wafer crumbs for texture, arrange fresh banana slices on top, and add a dollop of whipped cream if you are feeling extra fancy today.
- Chill and set:
- Cover the cups loosely with plastic wrap and refrigerate for at least 2 hours before serving. This chilling time is non-negotiable—the flavors need to meld and the layers need to firm up slightly for that perfect spoonful.
 Save
Save My niece once asked if she could lick her cup clean, and honestly, I did not blame her one bit. There is something deeply satisfying about scraping that last bit of cheesecake from the bottom.
Making These Ahead
The beauty of these cups lies in how well they hold up in the refrigerator. I have assembled everything except the final toppings the night before a party, which actually improves the texture as the wafer crust softens slightly and absorbs some of that creamy filling.
Serving Suggestions
While these stand beautifully on their own, a sprinkle of cinnamon on the whipped cream adds a warmth that cuts through the richness. A drizzle of caramel sauce over the top would be absolutely swoon-worthy too.
Storage and Leftovers
These will keep covered in the refrigerator for up to 3 days though the banana layer may darken slightly. The texture remains remarkably consistent, making them an excellent make-ahead dessert for busy weeks or unexpected guests.
- Press plastic wrap directly onto the surface to prevent a skin from forming if storing longer than 24 hours
- The cups can be frozen for up to a month though the texture of the bananas will suffer slightly
- Bring them to room temperature for about 10 minutes before serving for the creamiest experience
 Save
Save These little cups have become my go-to for bringing smiles to faces, one creamy spoonful at a time.
Recipe FAQs
- → How long should I chill the cups before serving?
-
Refrigerate the cups for at least 2 hours before serving. This allows the layers to set properly and flavors to develop. For best results, you can chill them up to 24 hours in advance, though add fresh banana toppings just before serving to prevent browning.
- → Can I make these cups ahead of time?
-
Yes, these cups can be prepared up to 24 hours in advance. Assemble the crust, cheesecake layers, and pudding layer, then cover and refrigerate. Add fresh banana slices and wafer crumb toppings just before serving to maintain optimal texture and appearance.
- → How do I prevent the banana slices from turning brown?
-
Toss sliced bananas lightly in lemon juice before adding them as a topping. The citrus helps prevent oxidation and browning. Alternatively, add banana slices immediately before serving, or arrange them as a garnish that guests can add themselves.
- → Can I substitute the vanilla wafer cookies?
-
Graham cracker crumbs or digestive biscuits work well as alternatives to vanilla wafers for the crust. For a different flavor profile, try using Nilla wafers, Biscoff cookies, or even crushed shortbread cookies. The texture and butter ratio should remain similar.
- → What size cups work best for this dessert?
-
Individual serving cups, jars, or ramekins holding approximately 6-8 ounces work well. Clear glass containers showcase the beautiful layers. You can also use small mason jars, wine glasses, or even disposable plastic cups for easy serving at parties.
- → Can I make this as a full-size cheesecake instead of individual cups?
-
Yes, you can adapt this recipe for a 9-inch springform pan. Press the crust into the bottom, then spread layers of cheesecake filling, sliced bananas, and banana pudding. Chill for 4-6 hours or overnight until completely set before slicing.
