 Save
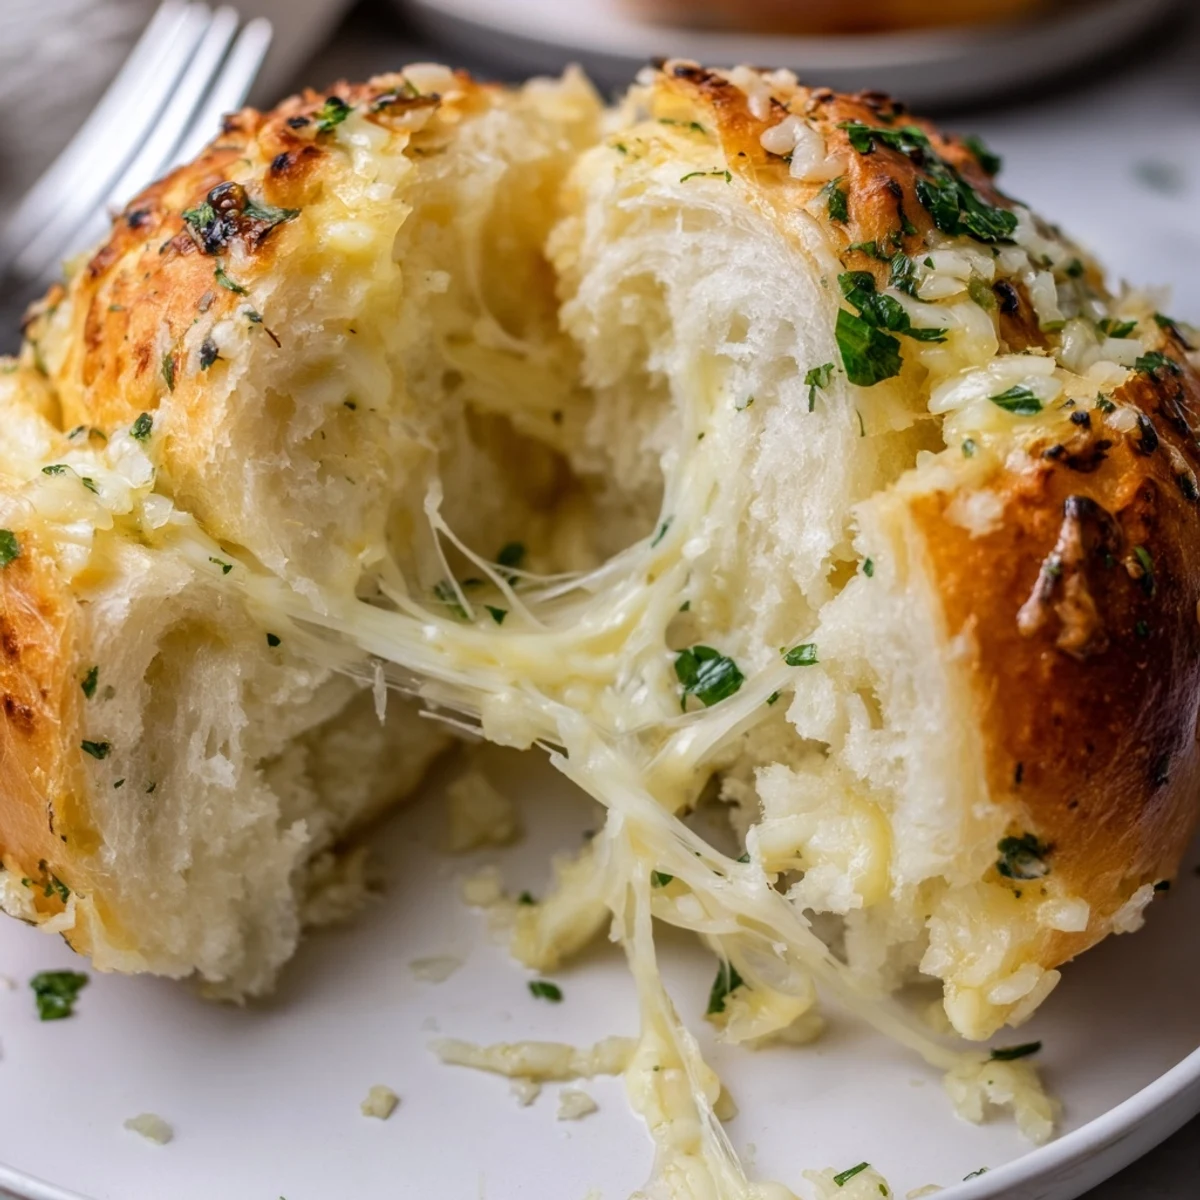
Save These buttery cheese garlic rolls start with a soft yeasted dough made from flour, warm milk, yeast, butter and egg, kneaded until smooth and doubled during a one-hour rise. Each ball is filled with garlic-butter, mozzarella and Parmesan, sealed and proofed briefly before baking at 180°C until golden. Brush with extra garlic butter when hot for glossy, aromatic rolls that freeze and reheat well.
The first time I tried making these cheese garlic rolls, the kitchen filled with the warmth of rising dough and the irresistible scent of garlic mingling with melting butter. When the timer rang, my neighbor poked her head in the door, drawn by the aroma drifting down the hallway. There&aposs a particular thrill in lifting golden rolls from the oven, their tops glistening, knowing the cheese inside has gone all gooey. Every batch since, I look forward to that moment when the butter sizzles against hot bread and fills the air with magic.
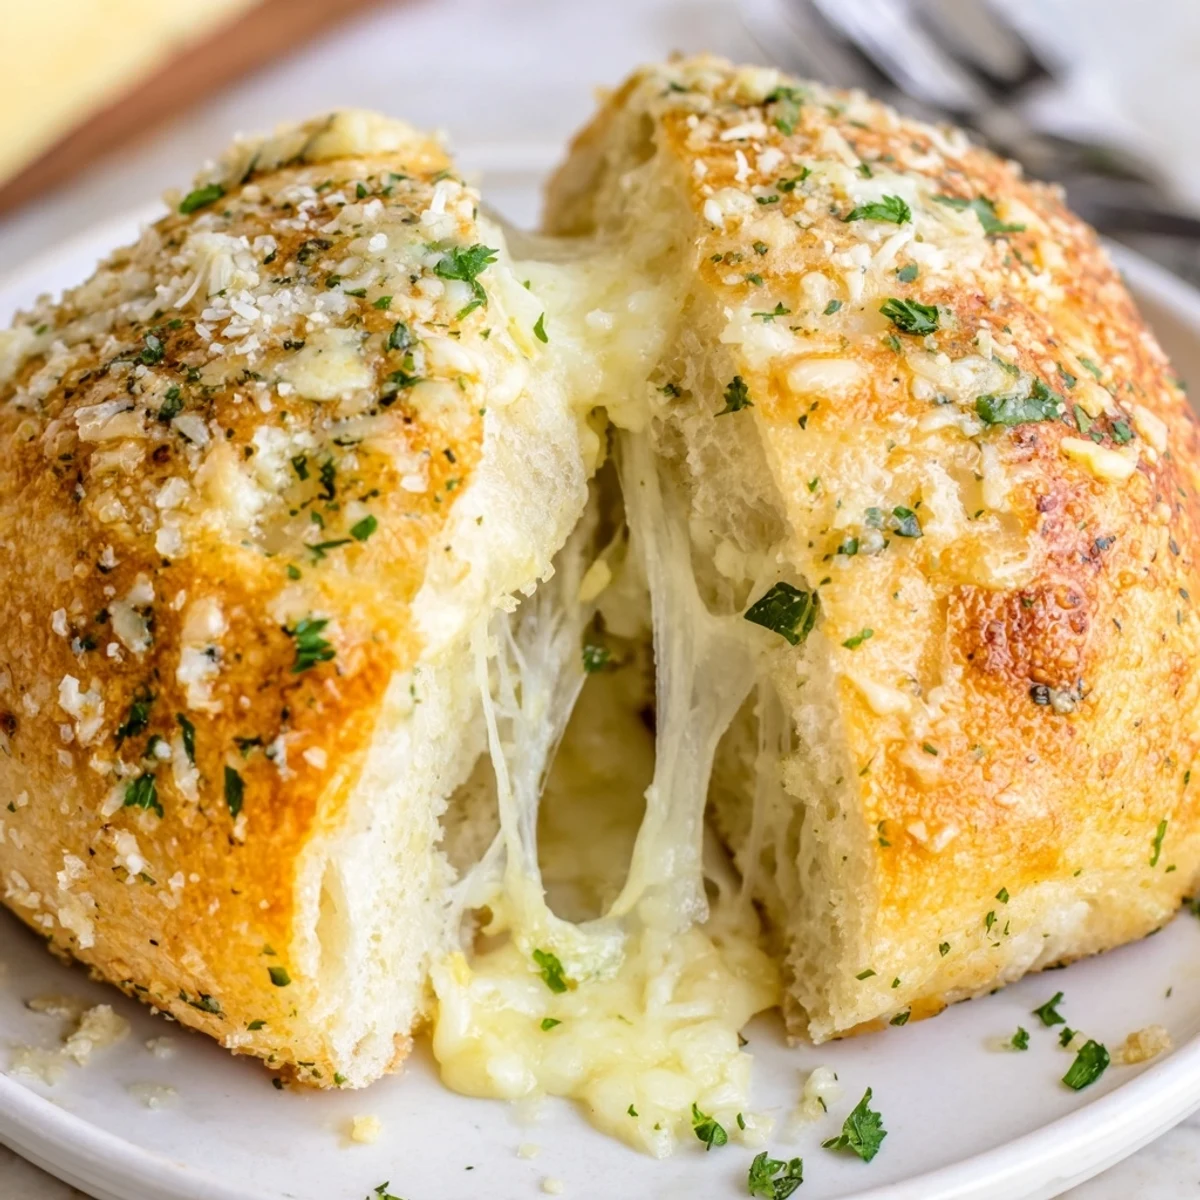
I once brought a tray of these rolls to a game night, thinking they&aposd just be a backup snack, but they vanished within minutes of hitting the table. Someone started nicknaming them "magic pillows" while laughing at the buttery fingerprints everyone left on the card game. That easy, communal messiness is what makes sharing these so special. Even the most serious friend couldn't help but grin at the stretchy cheese pull.
Ingredients
- All-purpose flour: I learned that weighing the flour (375 g) gives you the lightest dough, helping the rolls stay fluffy rather than dense.
- Active dry yeast: Letting it get foamy in warm milk (around 110°F is perfect) is the secret to that good rise.
- Sugar: Just a spoonful wakes up the yeast and adds gentle sweetness that makes the garlic shine.
- Salt: Don&aposs skip it—salt brings out all the other flavors, trust me.
- Warm milk: Using milk instead of water gives the rolls an extra tender crumb you can taste.
- Unsalted butter: Both in the dough and filling, butter makes everything soft and rich—be generous but don&aposs let it get too hot or it can melt your yeast!
- Large egg: It binds the dough and gives a little color, but crack it in at room temp so the dough stays happy.
- Garlic: Finely minced, fresh garlic gives punch, especially in the filling and the topping—skip the jarred stuff for the real deal.
- Mozzarella cheese: Shredded mozzarella stretches and melts beautifully, making every bite gooey.
- Parmesan cheese: A bit of Parmesan gives depth and salty notes—freshly grated makes all the difference.
- Fresh parsley and dried Italian herbs (optional): I add these for color and a little herby aroma, but they&aposre totally optional.
Instructions
- Wake Up the Yeast:
- In a large bowl, stir together the warm milk, sugar, and yeast. Wait until it's bubbly and frothy—it should smell yeasty and promise puffiness.
- Mix and Knead:
- Add the softened butter, egg, and salt to the yeast mixture, then stir in flour bit by bit until a rough dough forms. Flour your hands and knead for several minutes until the dough feels smooth and springy—it's a little mini workout, but worth it.
- First Rise:
- Pop the dough into a greased bowl and cover with a towel. Let it rise somewhere slightly warm for about an hour, until doubled in size—it should jiggle and feel airy to the touch.
- Prepare the Filling:
- In a small bowl, mix together the melted butter, garlic, mozzarella, Parmesan, parsley, and herbs. The mixture should look thick and fragrant and have flecks of green from the herbs.
- Shape the Rolls:
- Punch down the dough gently, then divide into twelve equal pieces. Flatten each piece, add a generous spoonful of filling, and pinch securely to seal, shaping each into a ball (expect some cheese poking out—that&aposs gold).
- Second Rise:
- Arrange the dough balls seam side down on a parchment-lined tray and cover loosely. Give them about 25 minutes to puff up; they'll look plump and ready to bake.
- Bake:
- Bake in a preheated 350°F (180°C) oven for 20-25 minutes, until they're golden and the cheese is starting to ooze at the edges.
- Add the Topping:
- Immediately brush with garlic butter while still hot—listen for the sizzle. Finish with a flurry of parsley for a burst of color and fresh aroma.
 Save
Save I still grin at the memory of my friend biting into her roll, only to have molten cheese stretch halfway across the table—she insisted it was the "best kitchen accident" ever. It was pure, sticky-fingered joy and we laughed all evening about it. Sharing these warm from the oven made an ordinary night feel like a celebration. Moments like those remind me that food can create the best memories without any big occasion.
Dough Texture Tricks
If your kitchen is chilly, I learned to set the dough bowl near the oven or wrap it in a clean towel to help it rise faster. The dough should feel soft but not sticky, so sometimes I add an extra tablespoon of flour or so if needed. If you accidentally add too much flour, dribble in a bit of milk and knead it smooth again. Little adjustments can turn a good roll into a great one.
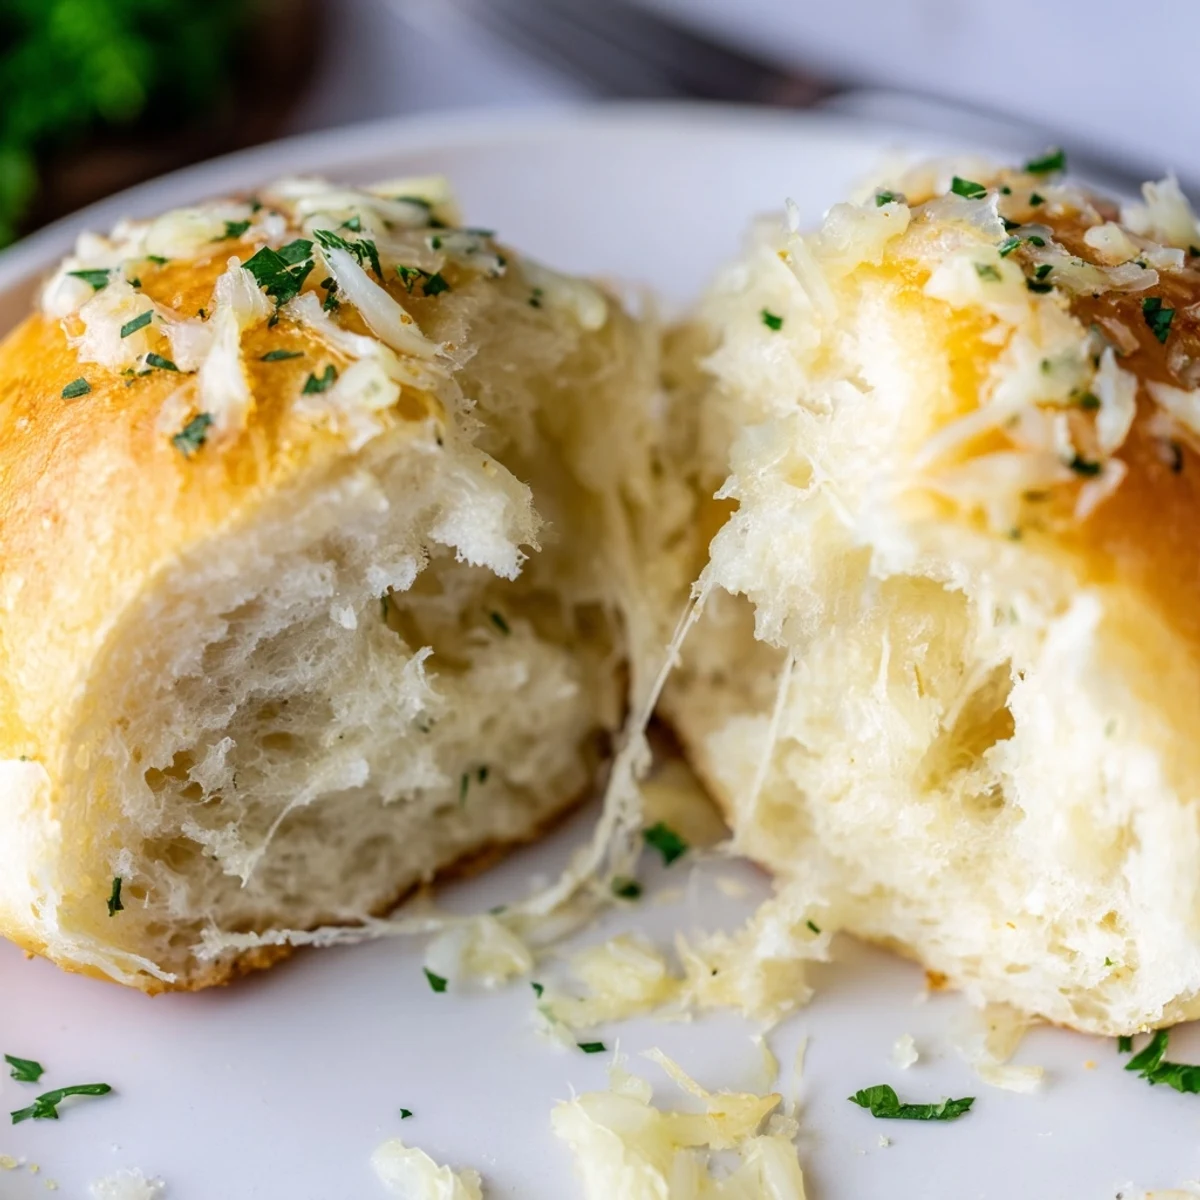
Cheese Filling: Messy Is Best
Don't be shy with the cheese—it's fine if some spills out during shaping or baking because those crispy bits become everyone's favorite part. Mixing the garlic with melted butter before adding the cheese helps spread the flavor more evenly throughout the filling. Freshly grated Parmesan has a bolder flavor than pre-grated, and after trying both, I always take the extra minute to grate it myself. Cheese-stained fingers are an unavoidable badge of honor for this recipe.
Make-Ahead and Serving Tips
These rolls freeze beautifully: bake as usual, let cool, then wrap tightly. When you want them again, just reheat in a hot oven for a few minutes and brush with fresh garlic butter. They pair with everything from soups to pasta, but are honestly satisfying all on their own.
- If you like a spicy kick, sneak in a little chili flake to the filling.
- Use any blend of cheese you love or have on hand—the recipe is flexible.
- Letting everyone grab their own roll straight from the tray is half the fun.
 Save
Save Here's to sharing buttery, fragrant rolls and messy, cheese-filled laughter at your table. There's just something about homemade bread that brings out the best in everyone around it.
Recipe FAQs
- → How should I store leftover rolls?
-
Cool completely, then keep in an airtight container at room temperature for 1–2 days. For longer storage, freeze in a sealed bag for up to 2 months and reheat in a hot oven to refresh the crust.
- → Can I use other cheeses?
-
Yes. Fontina, provolone, or a sharp cheddar work well alongside or in place of mozzarella and Parmesan. Blend for meltiness and a bit of sharpness to balance the garlic butter.
- → What ensures soft, pillowy texture?
-
Use warm (not hot) milk for the yeast, knead until smooth and elastic, and allow the dough to double in a warm spot. A full proof and gentle handling before the final rise yield a tender crumb.
- → Can I make the dough in a stand mixer?
-
Absolutely. Use the dough hook on low to combine then medium for 5–7 minutes until the dough is smooth and slightly tacky. Let it rise in a greased bowl until doubled.
- → How can I add a spicy kick?
-
Stir a pinch of chili flakes into the filling or sprinkle a few on top before baking. Smoked paprika in the butter also adds warm, smoky heat without overpowering the cheese.
- → Is freezing best before or after baking?
-
Freeze both ways: shape and freeze unbaked on a tray then transfer to a bag for later baking from frozen with extra proofing time, or bake, cool, and freeze for quick reheating in the oven.
