 Save
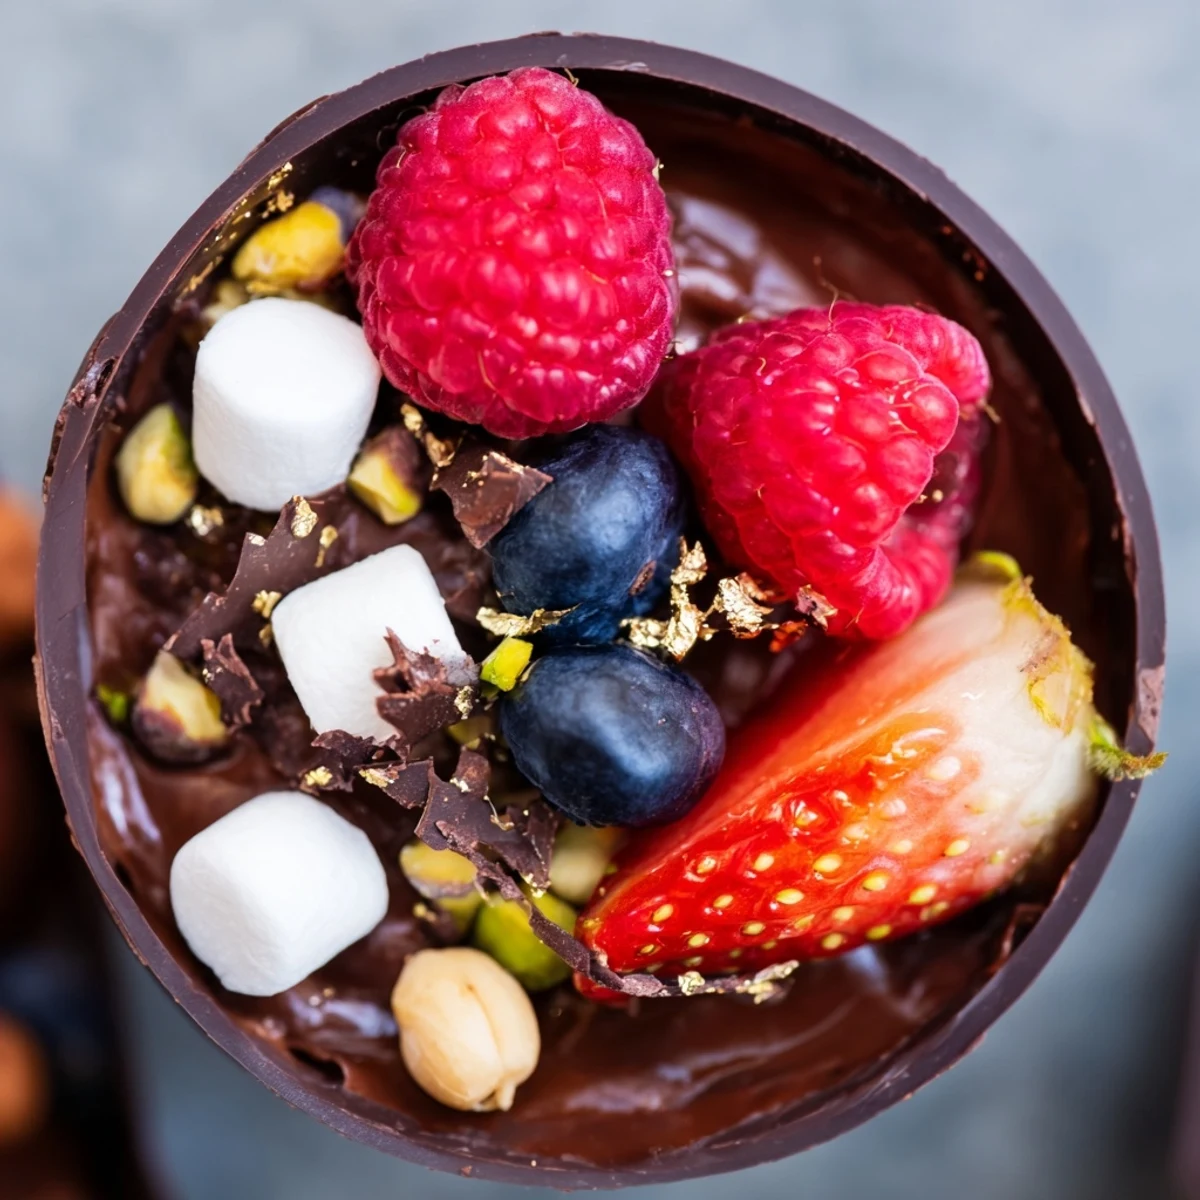
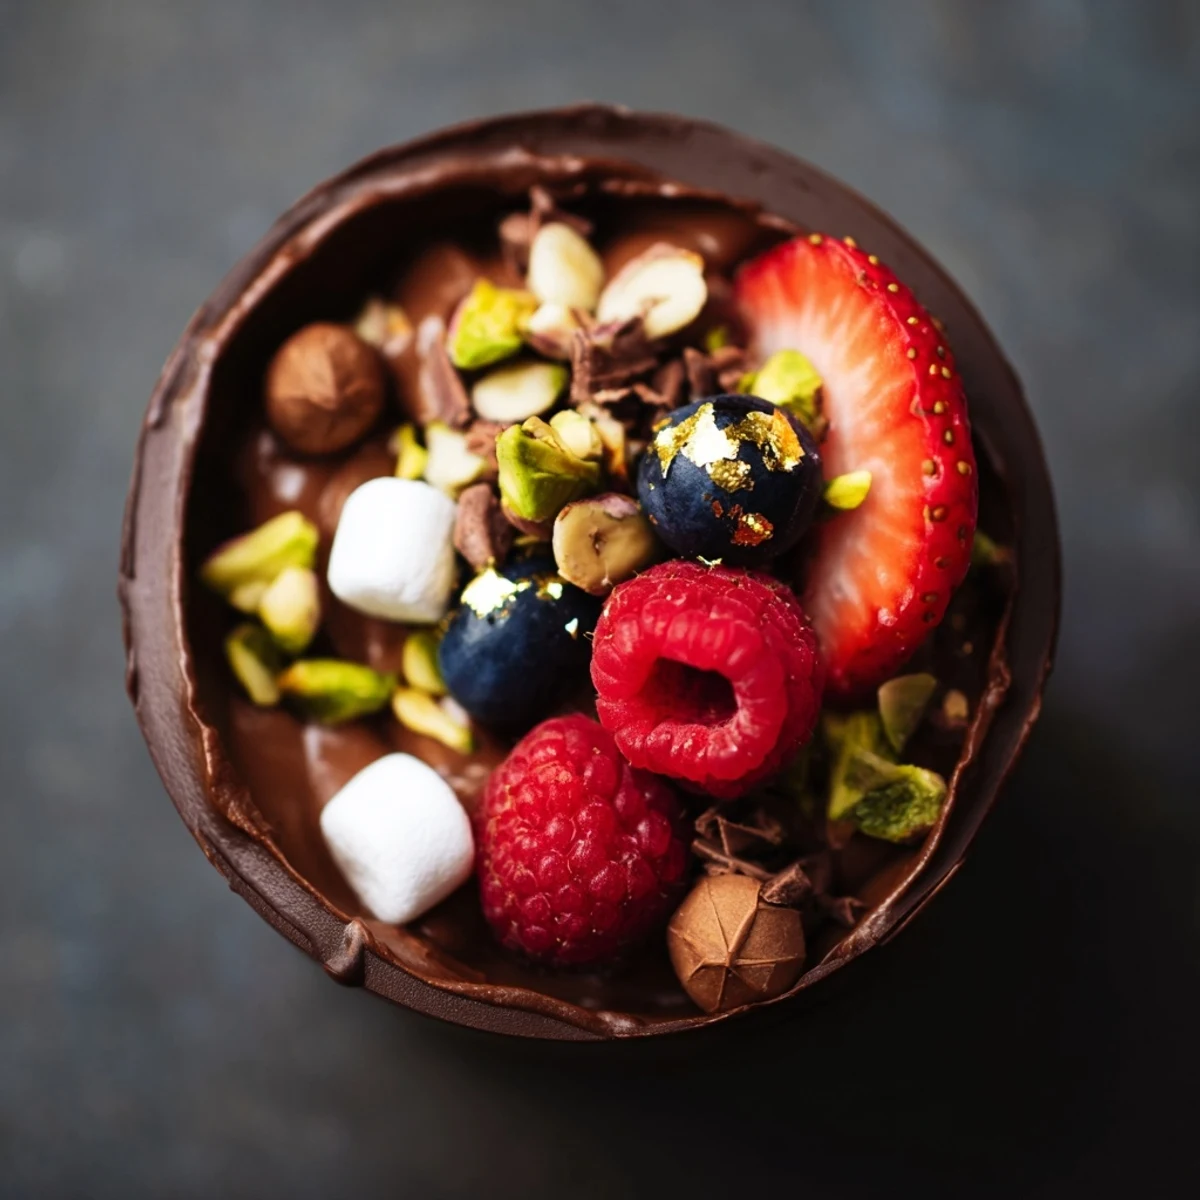
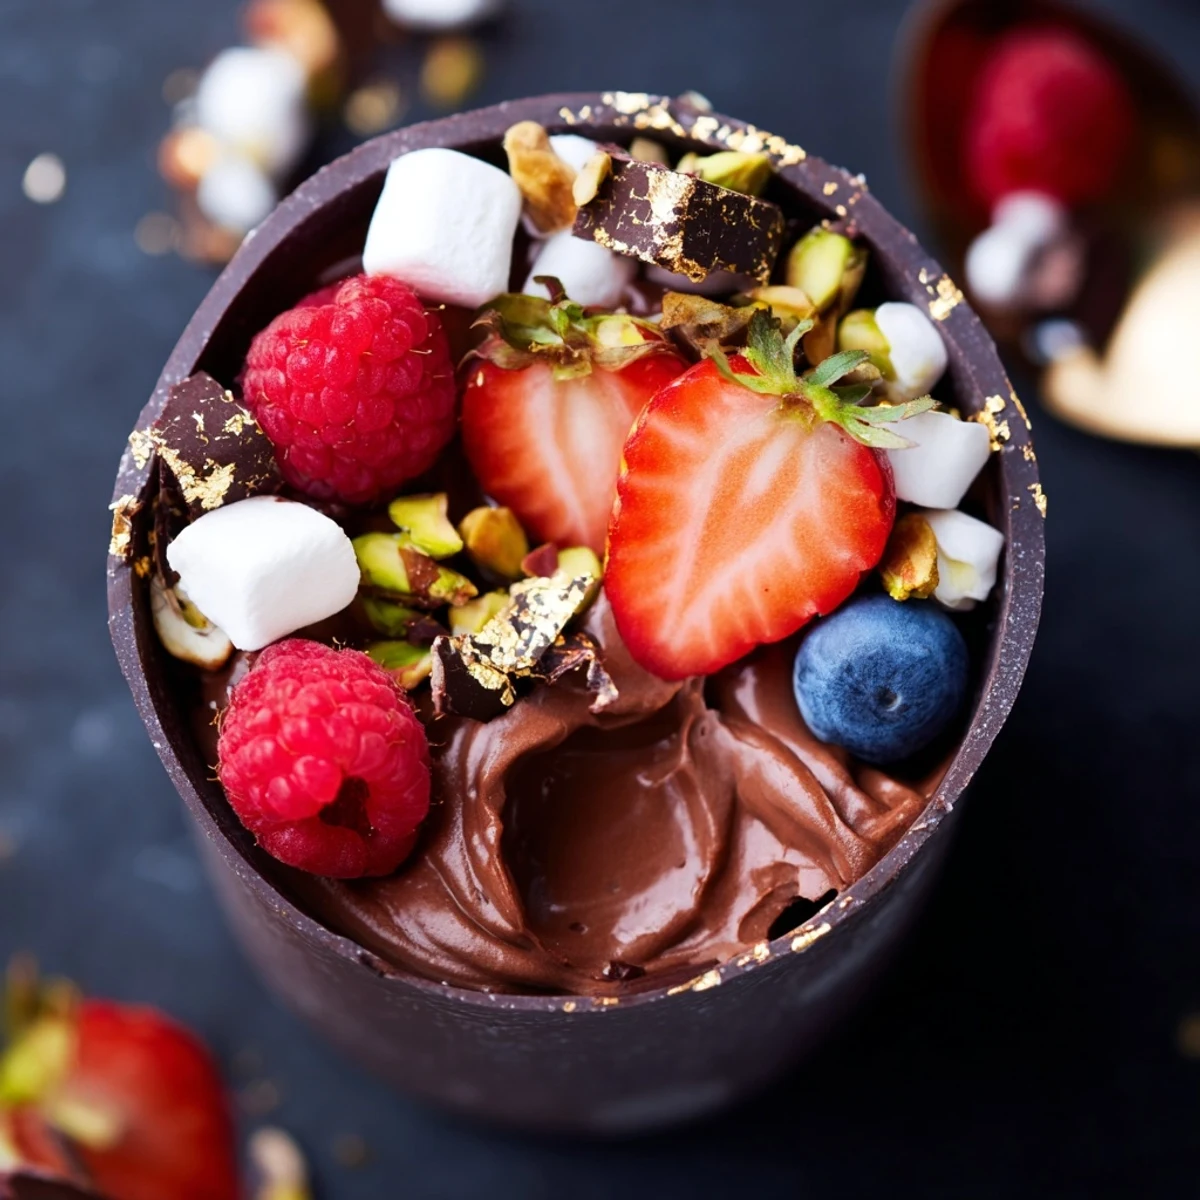
Save Create stunning dessert cups with handmade dark chocolate shells filled with silky chocolate mousse. These elegant treats feature layers of creamy vanilla-infused mousse topped with vibrant fresh berries, crunchy nuts, mini marshmallows, and decadent chocolate curls. Perfect for elevating any dessert table or celebrating special moments with a touch of luxury.
The first time I made chocolate cups for a dinner party, my guests actually gasped when I brought out the tray. Something about seeing chocolate shaped into an edible vessel makes people feel like they're getting away with something indulgent. I've since learned these little cups turn any gathering into a celebration, whether it's a Tuesday night dessert or New Year's Eve.
I served these at my sister's bridal shower last spring and watched as women who claimed they were too full for dessert suddenly made room for seconds. The best part was the grazing aspect—everyone dipping in, trying different combinations, debating whether nuts or marshmallows made the better topping. It turned dessert into a conversation instead of just a course.
Ingredients
- 200 g dark chocolate (60% cocoa): Higher cocoa percentage means the cups will hold their shape better at room temperature
- 200 ml heavy cream: Cold cream whips up faster and holds air longer—give it 10 minutes in the freezer first
- 100 g dark chocolate: This gets folded into the whipped cream so chop it small for faster melting
- 2 tbsp powdered sugar: Powdered sugar dissolves instantly into cold cream unlike granulated
- 1 tsp vanilla extract: Add this after whipping so it doesn't weigh down the cream
- 1 cup fresh mixed berries: Let berries come to room temperature before serving so their juices flow when bitten
- 2 tbsp chopped nuts: Toast them lightly in a dry pan first for extra fragrance
- 2 tbsp mini marshmallows: These add fun puffiness that contrasts beautifully with dense chocolate
- 2 tbsp chocolate curls: Use a vegetable peeler on room temperature chocolate for effortless curls
- 1 tbsp edible gold: A little goes a long way and makes these feel truly special
Instructions
- Melt chocolate for cups:
- Break chocolate into pieces and microwave in 30 second bursts, stirring between each, until completely smooth and glossy.
- Coat the liners:
- Use a pastry brush to paint melted chocolate up the sides of silicone liners, making the layer thick enough to not break when peeled later.
- Chill until firm:
- Place liners in the refrigerator for at least 20 minutes until the chocolate has completely hardened and lost its shine.
- Unmold chocolate cups:
- Gently peel away the silicone liners starting at the top, working slowly to avoid cracking the delicate edges.
- Prepare the mousse base:
- Melt the second amount of chocolate and let it cool until it feels barely warm to the touch.
- Whip the cream:
- Beat heavy cream with powdered sugar just until soft peaks form—overwhipped cream will make the mousse grainy.
- Combine chocolate and cream:
- Stir a scoop of whipped cream into the melted chocolate to lighten it, then fold that mixture back into the remaining cream.
- Fill the cups:
- Spoon mousse into each chocolate cup until they're two thirds full, leaving room for toppings.
- Add the toppings:
- Arrange berries, nuts, marshmallows, and chocolate curls on top of each cup, letting them mound naturally.
- Final chill:
- Refrigerate assembled cups for 20 minutes so the mousse firms up slightly before serving.
 Save
Save My four year old nephew helped me assemble a batch last Christmas and took his job of placing each berry with such solemn seriousness. When everyone reached for his cups first, declaring them the most beautifully arranged, I saw him understand that cooking is about making people feel seen.
Making Ahead
The chocolate cups keep beautifully in an airtight container between sheets of parchment paper for up to a week. The mousse holds its texture for 24 hours in the refrigerator, though it's at its fluffiest within the first six hours of whipping.
Serving Suggestions
These cups work best when set out on a large platter or wooden board where guests can help themselves. I like to arrange extra bowls of toppings on the side so people can customize their final bites—someone always wants more marshmallows.
Flavor Variations
Swap the dark chocolate for white chocolate in the cups and add citrus zest to the mousse for a completely different vibe. I once made a mocha version by dissolving instant espresso in the melted chocolate before folding it into the cream, and it disappeared faster than the original.
- Try adding a tablespoon of liqueur like Grand Marnier or Chambord to the melted chocolate before folding
- Sprinkle flaky sea salt over the finished cups for a sophisticated sweet and salty contrast
- During summer, swap fresh berries for grilled stone fruits and add a basil leaf for brightness
 Save
Save There's something deeply satisfying about edible containers, like you're getting away with a secret delight. These cups remind me that the most memorable desserts are often the ones that feel like a tiny act of rebellion against ordinary expectations.
Recipe FAQs
- → How long can chocolate grazing cups be stored?
-
These cups are best enjoyed within 24 hours for optimal texture. Store in the refrigerator covered loosely with plastic wrap. The chocolate shells may become soft over time, so assembling shortly before serving is recommended.
- → Can I make the chocolate cups in advance?
-
Yes, prepare the chocolate cups up to 2 days ahead. Store them carefully between layers of parchment paper in an airtight container in the refrigerator. Keep them at room temperature for 10 minutes before filling to prevent cracking.
- → What chocolate percentage works best?
-
Dark chocolate with 60-70% cocoa content provides the ideal balance of sweetness and intensity. Higher percentages yield very rich cups, while milk or white chocolate create sweeter, creamier variations if desired.
- → How do I prevent the chocolate shells from cracking?
-
Ensure the chocolate is properly tempered by melting slowly and cooling to room temperature before coating. Apply thin, even layers and chill gradually. Rushing the chilling process can cause cracks due to temperature shock.
- → Can I substitute heavy cream in the mousse?
-
Coconut cream works as a dairy-free alternative, though the texture will be slightly denser. For a lighter version, use half heavy cream and half Greek yogurt, though this yields a tangier mousse.
- → What other toppings work well?
-
Consider crushed pretzels for salted contrast, shredded coconut for tropical flair, candied citrus peel for brightness, or crushed cookies for added crunch. Edible flowers add a beautiful finishing touch for special events.
