 Save
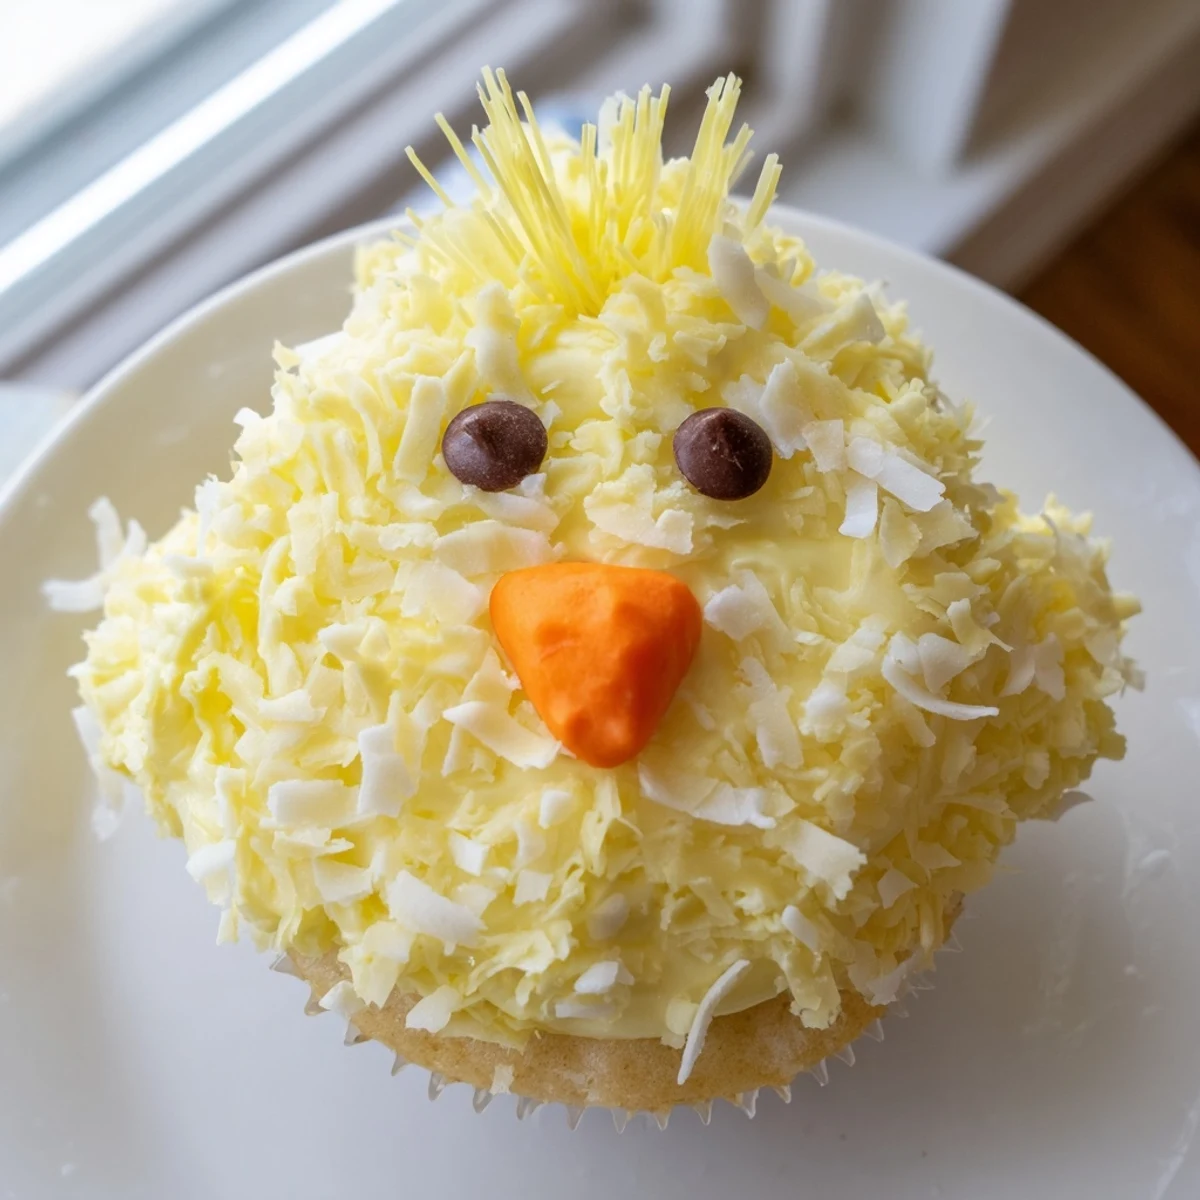
Save These charming Easter chick cupcakes feature classic vanilla bases topped with vibrant yellow buttercream and playful decorations. The fluffy frosting mimics soft chick feathers, while mini chocolate chips create eyes and orange candies form beaks. Optional shredded coconut adds realistic texture. Ready in 45 minutes, these handheld delights are perfect for Easter brunch, spring parties, or festive baking with children.
The first time I made these Easter chick cupcakes, my kitchen counter looked like a tiny yellow poultry farm had taken over. I had coconut in my hair, frosting on my nose, and my daughter was giggling so hard at the crooked beak on one particularly lopsided chick that we nearly cried.
Last year I brought two dozen to our neighborhood egg hunt, and I swear the adults were fighting over them more than the children. My neighbor texted me three days later asking if I had another batch hidden somewhere, and her kids keep asking when the yellow birds are coming back.
Ingredients
- All-purpose flour: The foundation of tender, light cupcakes that wont collapse under all that adorable frosting
- Baking powder and baking soda: These work together to give your cupcakes the perfect rise and fluffy texture
- Unsalted butter: Room temperature butter blends beautifully and gives you control over the salt level
- Granulated sugar: Sweetens and tenderizes the crumb while helping create that lovely golden cupcake dome
- Large eggs: Essential for structure and richness, bring them to room temperature for better incorporation
- Vanilla extract: Pure vanilla makes everything taste better, dont be tempted to skip or reduce it
- Whole milk: Creates a moist, tender crumb and helps balance the sweetness
- Powdered sugar: Gives the frosting that silky smooth texture and holds everything together
- Yellow gel food coloring: Gel coloring wont thin out your frosting like liquid varieties can
- Mini chocolate chips: Perfectly sized eyes that make each chick look ridiculously expressive
- Orange candy-coated chocolates: These little beaks are what bring the whole chick personality to life
- Sweetened shredded coconut: Creates the most convincing feathery texture, but completely optional
Instructions
- Getting your oven ready:
- Preheat to 350°F and line your muffin tin with liners, taking time to center them properly for nicely shaped cupcakes
- Mixing the dry ingredients:
- Whisk together flour, baking powder, baking soda, and salt in a medium bowl until everything is evenly distributed
- Creaming the butter and sugar:
- Beat butter and sugar until the mixture turns pale and fluffy, which usually takes about 3 minutes of patient mixing
- Adding eggs and vanilla:
- Add eggs one at a time, fully incorporating each before adding the next, then mix in the vanilla until fragrant
- Combining wet and dry:
- Add half the dry ingredients, then all the milk, then remaining dry mix, stopping the moment flour streaks disappear to prevent tough cupcakes
- Baking to perfection:
- Divide batter evenly and bake for 18 to 20 minutes until a toothpick comes out clean, then cool completely before frosting
- Making the yellow buttercream:
- Beat butter until creamy, gradually add powdered sugar alternating with milk, then tint with yellow gel coloring until you reach your desired chick shade
- Creating the fluffy chicks:
- Frost generously, optionally dip in coconut for feathers, then place two chocolate chip eyes and one orange candy beak on each cupcake
 Save
Save My niece accidentally made one chick with crossed eyes using slightly tilted chocolate chips, and that goofy little bird became the centerpiece of our dessert table. Sometimes the imperfect ones end up being everyones favorite because they have so much personality.
Making Them In Advance
I learned through experience that you can bake the cupcakes up to two days ahead and store them in an airtight container, but frost them the same day you plan to serve them. The buttercream firms up beautifully in the fridge, but coconut can get soggy if it sits too long on the frosting.
Getting Kids Involved
The decorating step is where kitchen magic happens with little helpers. Set up a station with bowls of eyes and beaks, let them arrange the faces, and try not to micromanage the symmetry. Their creative interpretations often turn out more charming than anything we could plan ourselves.
Storage And Serving
Keep finished cupcakes in a container with a loose lid at room temperature for up to two days, after which the cake starts to dry out even under all that frosting. If you need to store them longer, freeze unfrosted cupcakes and thaw them overnight before decorating.
- Use a clean damp paper towel to wipe any frosting smudges off the cupcake liners for a polished presentation
- Place cupcakes on the serving platter with a small dot of frosting underneath to prevent sliding during transport
- If your kitchen is warm, briefly chill the frosted cupcakes for 10 minutes to firm the frosting before adding decorations
 Save
Save There is something genuinely joyful about serving dessert that makes people smile before they even take a bite. These little chicks have become my spring signature, and I hope they bring as much happiness to your table as they have to mine.
Recipe FAQs
- → How far ahead can I make these?
-
Prepare cupcakes up to 2 days in advance. Store in an airtight container at room temperature. Decorations stay fresh and adhesive for the full duration.
- → What can I use instead of candy beaks?
-
Orange sprinkles, cut orange gummies, or shaped marzipan work beautifully. Simply cut small triangles and press into the frosting.
- → Can I use box cake mix?
-
Absolutely. Start with your favorite yellow cake mix to save time. Focus your efforts on the buttercream and decorating for professional results.
- → How do I get bright yellow frosting?
-
Use gel food coloring rather than liquid. Start with a small amount on a toothpick and gradually add until you reach your desired vibrant shade.
- → What piping tip works best?
-
A grass tip creates realistic feathery texture. Alternatively, a large star tip gives fluffy chick-like swirls that hold decorations securely.
- → Are these suitable for kids' parties?
-
Perfect choice. The decorating process is simple enough for children to help with, and the individual portions make serving hassle-free.
