 Save
Save These flourless bars combine the natural sweetness of ripe bananas with rich, creamy peanut butter for a moist and satisfying treat. The simple preparation requires just one bowl and 10 minutes of prep time before baking to golden perfection. Naturally gluten-free and packed with protein, these bars work wonderfully for breakfast, afternoon snacks, or dessert.
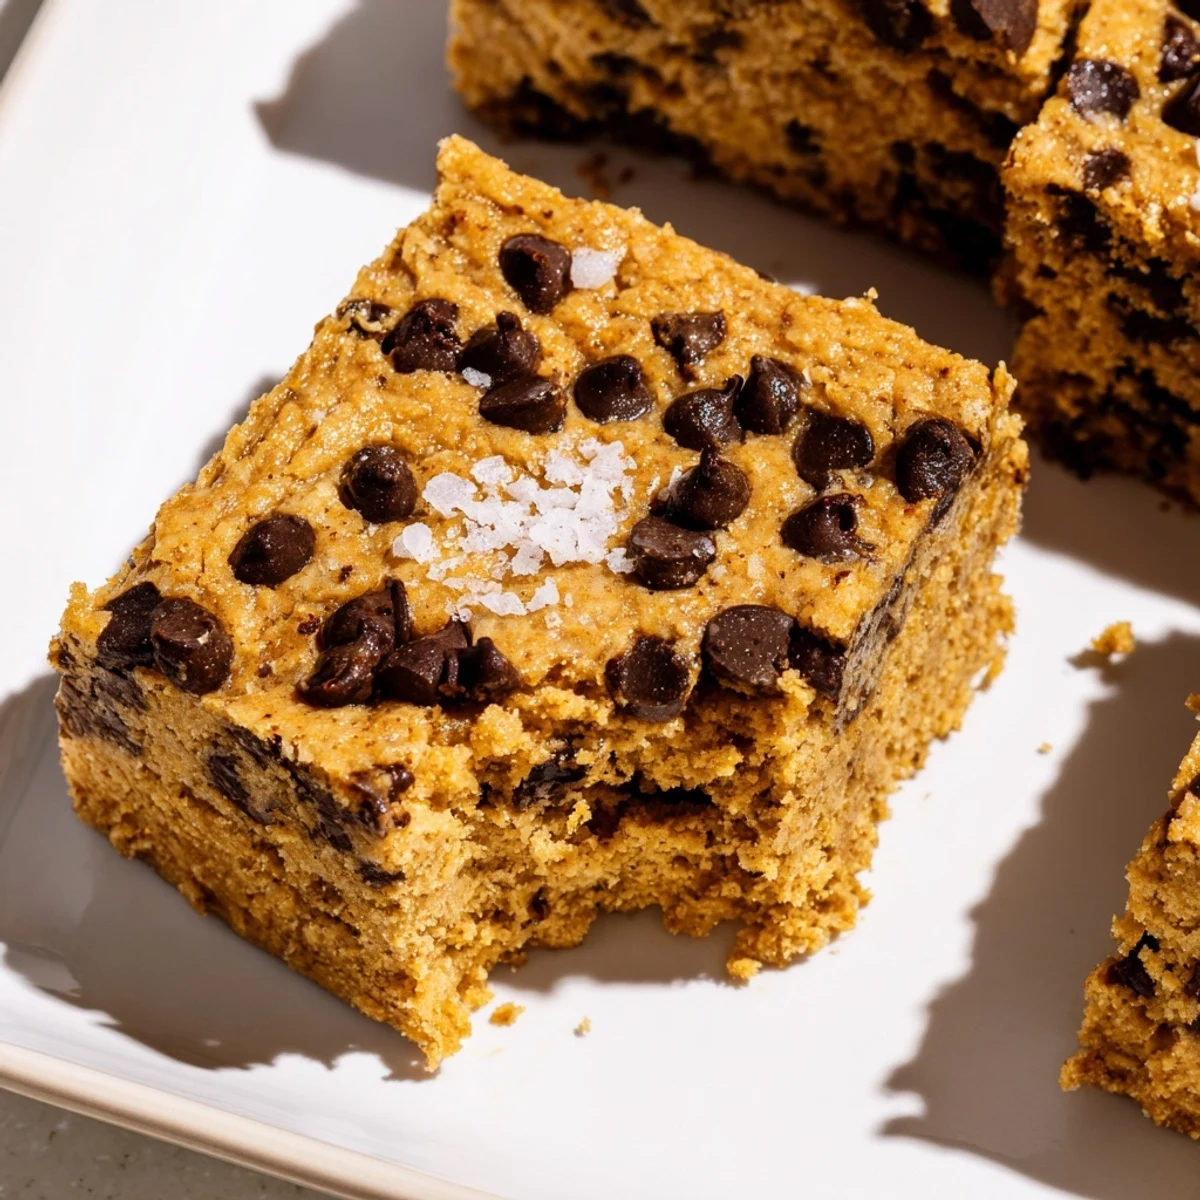
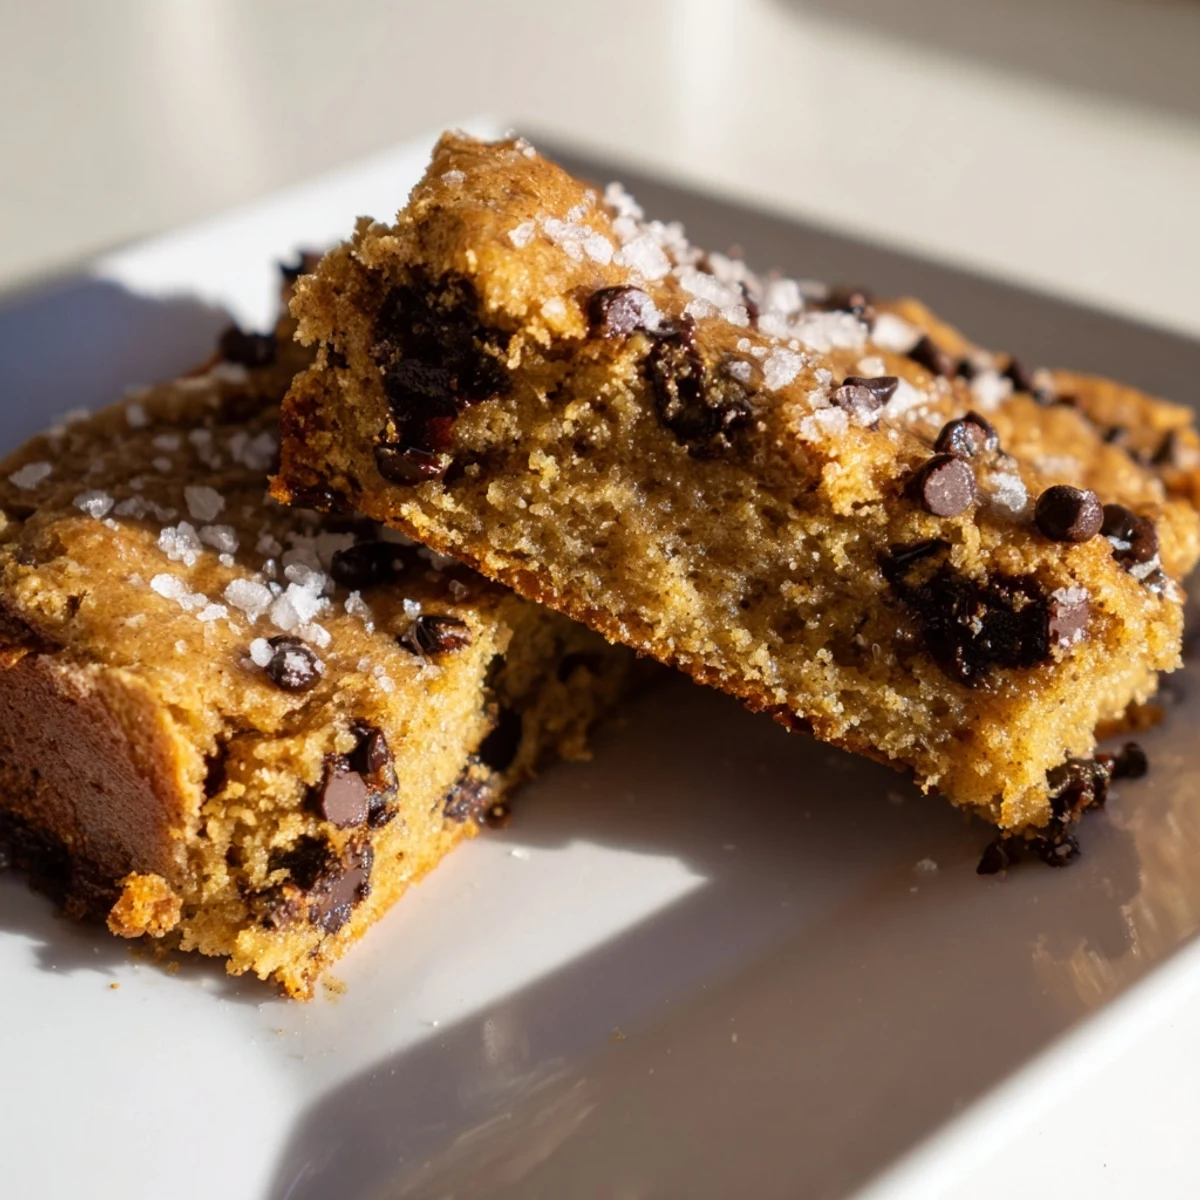
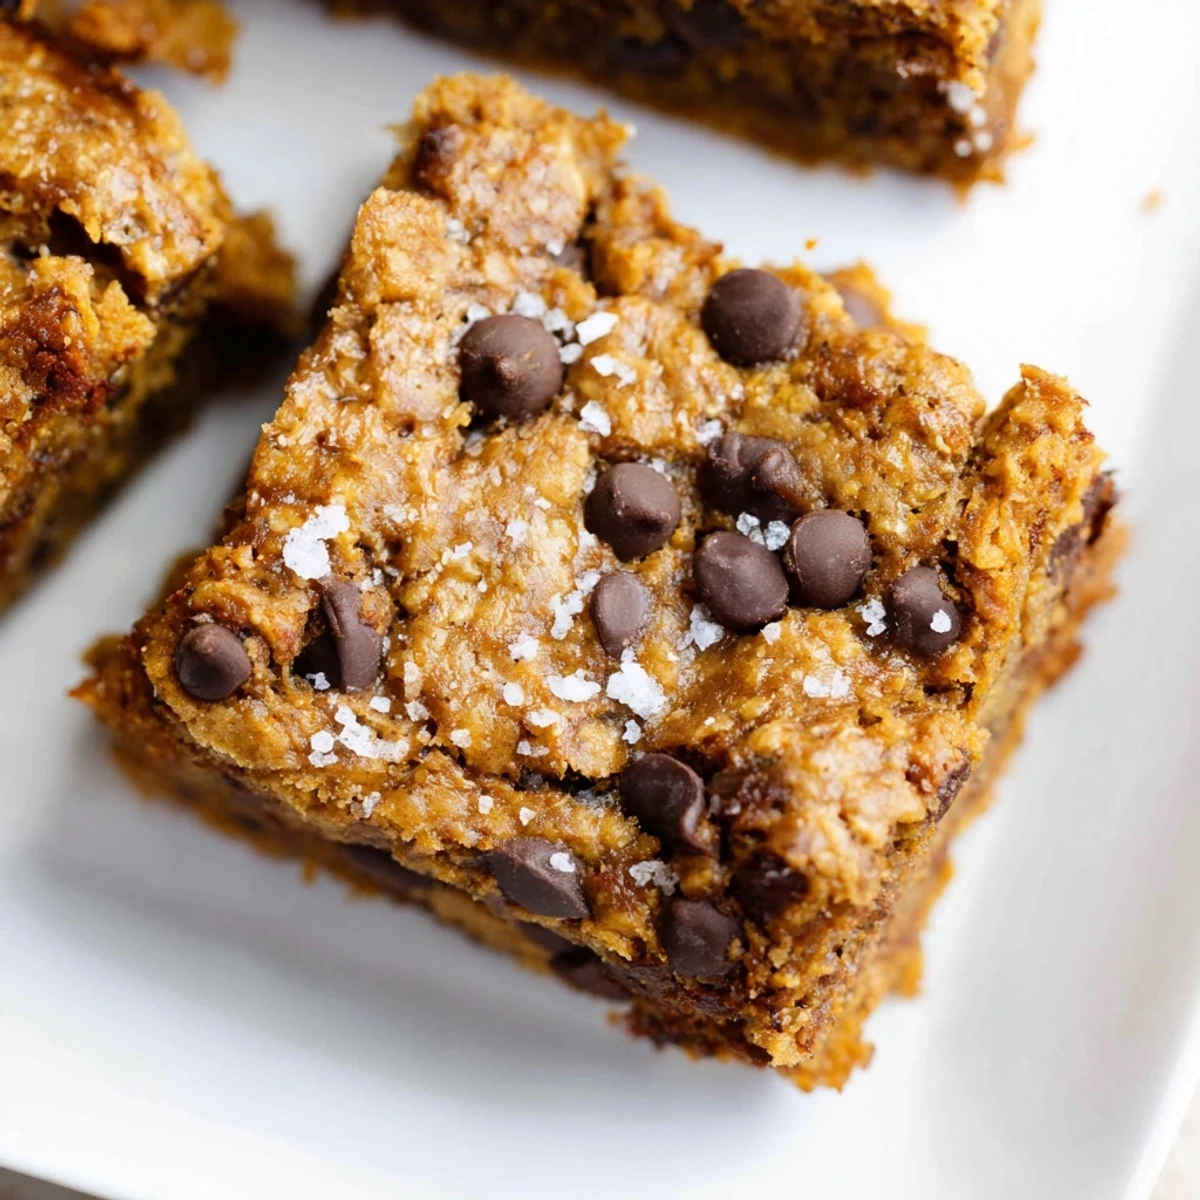
The texture is wonderfully dense and fudgy, with the bananas keeping everything moist while the peanut butter provides a rich, nutty depth. Optional dark chocolate chips add pockets of melted richness throughout.
The afternoon I discovered these bars, I was standing in my kitchen with three overripe bananas and zero motivation to make yet another loaf of banana bread. Something about the way peanut butter smells when you first open the jar sparked an idea that turned into a complete kitchen experiment. These bars emerged from that moment of curiosity, and now they are the most requested treat in our house.
Last winter, my friend Sarah came over feeling overwhelmed by life in general. I pulled a pan of these from the oven, still warm, and we ate them standing at the counter while she talked. She left with the recipe written on a napkin and a noticeably lighter spirit.
Ingredients
- 2 large ripe bananas: The blacker and spottier, the better they will mash and sweeten your bars naturally
- 1 cup creamy peanut butter: Room temperature makes all the difference for smooth mixing
- 2 large eggs: These provide structure without any flour needed
- 1/4 cup pure maple syrup: Adds just enough sweetness to complement the bananas without overpowering
- 1 tsp vanilla extract: Always use pure vanilla for that warm, rounded flavor
- 1/2 tsp ground cinnamon: A pinch that makes everything taste cozy
- 1/4 tsp fine sea salt: Crucial for balancing the sweetness and enhancing the peanut butter
- 1/2 tsp baking soda: The only leavening you need for lift
- 1/3 cup dark chocolate chips: Optional, but highly recommended for that perfect contrast
Instructions
- Preheat your oven:
- Set it to 350°F (175°C) and line an 8x8-inch pan with parchment paper, letting the edges overhang for easy removal later
- Mash those bananas:
- Get them good and broken down in a large mixing bowl until they are almost smooth with just a few small chunks remaining
- Combine your wet ingredients:
- Add the peanut butter, eggs, maple syrup, and vanilla, then mix until everything is incorporated and the batter looks glossy and smooth
- Add the dry ingredients:
- Sprinkle in the cinnamon, salt, and baking soda, then stir well until you cannot see any white specks of baking soda anymore
- Fold in the chocolate:
- Gently incorporate the chocolate chips, being careful not to overmix at this stage
- Spread and bake:
- Pour the batter into your prepared pan, spread it evenly, and bake for 20 to 22 minutes until the center is set and a toothpick comes out clean
- The hardest part:
- Let them cool completely in the pan before slicing, otherwise they will crumble and you will lose half the batch to taste testing
 Save
Save These bars have become my go-to for new neighbors, sad friends, and Tuesday mornings that need a little extra love. They somehow taste even better the second day.
Making Them Vegan
I have made these with flax eggs countless times for my dairy-free friends, and the texture holds up beautifully. The bars become slightly denser but just as satisfying, with that same rich peanut butter flavor shining through.
Storage Secrets
Room temperature is fine for the first two days, but I recommend refrigerating after that. The cold actually firms them up and makes them even more fudgy. They freeze exceptionally well if you wrap individual portions.
Serving Ideas
Sometimes I warm a piece for 15 seconds and top it with a scoop of vanilla ice cream for an instant dessert. They also travel well in lunchboxes and hold up nicely in a backpack without getting squished.
- A sprinkle of flaky sea salt on top before baking creates this incredible sweet-salty contrast
- Melted chocolate drizzle over the cooled bars makes them look fancier for guests
- Serving them with coffee in the morning feels like treating yourself to something special
 Save
Save Hope these bars bring as much comfort to your kitchen as they have to mine.
Recipe FAQs
- → Are these bars actually flourless?
-
Yes, these bars contain no wheat flour, almond flour, or any grain-based flour. The bananas and peanut butter create the structure, making them naturally gluten-free and perfect for those avoiding grains.
- → Can I use natural peanut butter?
-
Absolutely. Natural peanut butter works perfectly in this recipe. Just make sure to stir it well before measuring, as the oil tends to separate. The texture may be slightly more dense but equally delicious.
- → How ripe should the bananas be?
-
Use bananas that are fully ripe with plenty of brown spots. The riper the banana, the sweeter and more moist your bars will be. Yellow bananas without spots won't provide enough sweetness or soft texture.
- → How should I store these bars?
-
Store in an airtight container at room temperature for up to 3 days. For longer freshness, refrigerate for up to a week. They also freeze well—wrap individually and freeze for up to 3 months.
- → Can I make these nut-free?
-
You can substitute creamy sunflower seed butter or tahini for the peanut butter. Both alternatives work well, though the flavor profile will change slightly. Sunflower butter provides the closest texture match.
- → Why did my bars turn out dry?
-
Dry bars usually result from overbaking or using underripe bananas. Check for doneness at 20 minutes—the center should be set but still slightly moist. Remember they continue cooking as they cool in the pan.
